Inktober 2018 #9 Leaf

Just something simple and fast so I can work on another piece. Funnily enough it was a rather tough piece. Not because it don’t have the skills but because the pen kept skipping and dropping not enough ink or noticeable droplets that messed with the values. Because of that I was forced to work with darker and darker values. A shame because I was aiming to try and get it to look realistic.


IMG_20181009_182302

Here is the process:

While I was refilling this little container where I keep the ink I wasn’t thinking and allowed an ink bubble to burst which of course fell onto the paper. After ending the cycle of mistakes I go and make simple and dumb one.

IMG_20181009_164952

IMG_20181009_165418


IMG_20181009_165807


IMG_20181009_170130


IMG_20181009_170537

IMG_20181009_170956

IMG_20181009_172646

I was actually planning to finish it at this point, but when uploading the pictures to my pc I saw that it would be an easy fix if I pushed the values further.


IMG_20181009_174235

So I did and ended with this.


IMG_20181009_182302

Hasta la proxima,

-NUBE


Inktober 2018 #8 Our dog

Today I wanted to draw my dog. I’ve had the idea of dressing him like a human, but that will be some other time (if I do do it, you’ll see what I mean). Now, because has hair all over I have to really think about where I place shading and where I leave it blank. I wanted to comment on this with Reina’s drawing but I feel like I have really gotten better at my control with the pen. I have a tendency to really press down hard when I draw and write, so hopefully all of this translates into my future projects.

This little guy has a tendency to show his cute face when he wants something. Whether it’s to get pet or if he wants to eat or drink some water. He lets us know by acting like he is eating something to say he wants to eat or he licks his tongue really loud to tell us he wants water. He’s such a funny guy.

Here is today’s Inktober drawing:


IMG_20181008_162105

And here is the reference picture:


My dog reference smudged resize

And the process:


IMG_20181008_115708


IMG_20181008_115908


IMG_20181008_120235


IMG_20181008_121501


IMG_20181008_122230


IMG_20181008_122431


IMG_20181008_122910


IMG_20181008_130114


IMG_20181008_130845


IMG_20181008_131840


IMG_20181008_132732


IMG_20181008_133819


IMG_20181008_134253


IMG_20181008_145250


IMG_20181008_145956


IMG_20181008_150438


IMG_20181008_153132


IMG_20181008_154556


IMG_20181008_155204


IMG_20181008_160506


IMG_20181008_161153


IMG_20181008_162105

Hasta la proxima,

-NUBE

Inktober 2018 #7 Tanaka Reina

Today is the 7th day so I decided to draw Tanaka Reina. It may seem strange since she is a 6th generation member but back in the day when she first joined Morning Musume she was given the nickname 07 by (I believe it was Iida Kaori). 0 is rei and 7 is nana, so rei+na = 07.

In any case Reina was definitely one of my favorite members in Morning Musume. She along with Ai were the main vocalist for Morning Musume back during the Platinum Era. She always had this tough demeanor, but if one saw Haromoni one could tell she was actually quite soft inside. She was the type who had doubts and was very self conscious but overcame it all with sheer will power and did her best to exude confidence. During the final years that the Platinum Era was still together, it seemed like she was opening up more and getting comfortable… Shame that all things must end.

After leaving and forming LoVendoЯ it seems like she mellowed out and is more comfortable with the people around her. I remember reading a blog post or something of the like where she wrote how she wished she had opened up more with some members when she had the chance. I like to think she was talking about her time with the Platinum Era members…

This time I tried to really control the shading on the face and skin. And this time I made sure to not make the eyes too dark, instead I gave it shades. I believe it looks much better this way.

IMG_20181007_124853

This is the reference picture used from Reina’s photobook RE (Return). I could’ve used any of them. Looking at them, I really get that sense of Fall.:

Re29

As usual, here is the process for those who are interested:

IMG_20181007_083139

IMG_20181007_085356

IMG_20181007_090433

IMG_20181007_091324

IMG_20181007_091643

IMG_20181007_092249

IMG_20181007_093103

IMG_20181007_093828

IMG_20181007_100242

IMG_20181007_100910

IMG_20181007_101828

IMG_20181007_120257

IMG_20181007_121417

IMG_20181007_124853

Hey, two days with no dumb mistakes. Not bad.

Hasta la proxima,

-NUBE


October is finally here! Inktober 2018 #1

I first heard about Inktober last year. I wasn’t really planing on joining in this year but after thinking about it, it should be a good way to practice my drawing and inking techniques.

What I understood about Inktober is that one should not only draw only using ink and a pen, but that one should not use anything else. So no rough drafting, just drawing with the pen and working with the mistakes that happens as one goes along.

For the my first drawing I of course drew Sayumi Michishige. I seem to be able to draw rather fast… or at least it seemed fast, I feel that those countless hours I spend investing on my drawing skills have been paying off.


IMG_20181001_223411

This is the reference I used from her book “Sayu: Sayumi Michishige Personal Book”:


IMG_20181001_210550

This is the process for those who are interested.


IMG_20181001_210858


IMG_20181001_211436

If you look to the right at Sayu’s left elbow you can see a big blotch of ink. That was a careless mistake I made where I ran my hand over it while the ink was still wet. Nothing I can do except keep going.


IMG_20181001_211912

IMG_20181001_212444


IMG_20181001_213222


IMG_20181001_213500


IMG_20181001_214015


IMG_20181001_215534


IMG_20181001_220342

IMG_20181001_221441

IMG_20181001_221956


IMG_20181001_223411

Oh, before I forget. I used a brush pen and this other pen to ink the boots. Forgot to take a photo of them with the dip pen.

I’ll try to draw one drawing everyday for Halloween, and also do some of the other artwork… it’s going to be a rather busy month.

In any case, that should be all,

Hasta la proxima,

-NUBE

Shin Shell of Fury POSTER parody of “New Fist of Fury”

I have already done one parody poster before, so I wanted to do another one. This time I wanted to give it a try doing it digitally.

This is the poster in question. This was back in the day when Jackie Chan was marketed as the new Bruce Lee, this movie is a continuation of the original Fist of Fury. The poster is quite amazing, but it was a bit scary as a project since it had so many parts to it. Lacking the experience at the time it took quite a bit of time, but I learned a lot.

Jackie chan new fist of fury

This is the poster finished on July 23.

Shin Shell of Fury POSTER resize

And here is the process. I tried to get as much as the background as I could. For this pieces I used the actual colors from the poster by using the eyedropper tool in Photoshop.

Shin Shell of Fury I resize

One thing to note is that I actually made a round figure for the faces but erased around the hair for a reason I don’t quite remember.

Shin Shell of Fury II resize

Shin Shell of Fury III resize


Shin Shell of Fury IV resize


Shin Shell of Fury V resize


Shin Shell of Fury VI resize

Shin Shell of Fury VII resize


Shin Shell of Fury VIII resize


Shin Shell of Fury IX resize

Shin Shell of Fury X resize


Shin Shell of Fury XI resize


Shin Shell of Fury XII resize


Shin Shell of Fury XIII resize

After this I added the text to make it like the original poster.

In any case that should be all, what do you guys think?

Hasta la proxima,

-NUBE

First attempt at using Stabilo Pens – subject: Michishige Sayumi

I recently bought some new pens when I went to a somewhat local art store. When I was browsing around I came upon some pens that I haven’t seen before named Stabilo pens. After looking at them I noticed that they were almost exactly what I was looking for. In the past Copics used to have multiliners that came in different colors which I would have loved to use as outlines for my artwork, but they got discontinued a good bit ago. Ever since I was trying to find a replacement I could try and use instead but I wasn’t too happy with the limited selection Prismacolor had so I haven’t really used them since I bought them a couple of years ago. But these Stabilo pens seem to have a rather robust color selection  and they also offered different nib sizes (though for now I’m really only interested in the multiliner type). And when I saw their price being really cheap I thought what the heck, so I bought 10 (all of them either skin tones or grays). So since this was going to be my first try using them I decided to give the honor to Michishige Sayumi as the subject. Here’s what it looks like finished (done with my new Stabilo pens and Copics). Process below for those who are interested.

Sayumi Michishige 1st attempt Stabilo pens resize


It’s been a while since I’ve done a piece traditionally so I was a bit worried, but it went rather smoothly and the whole portrait took me only a couple of hours.

On the right are my new pens, these are the colors I have so far.

IMG_20180905_151147 resize

And as usual I start outlining using my 2H pencil.

IMG_20180905_151757 resize

IMG_20180905_152444 resize

IMG_20180905_153153 resize

IMG_20180905_154916 resize

IMG_20180905_155053 resize

IMG_20180905_160853 resize

IMG_20180905_162644 resize

IMG_20180905_162647 resize

IMG_20180905_165725 resize

IMG_20180905_170841 resize

IMG_20180905_172125 resize

IMG_20180905_172739 resize

IMG_20180905_173337 resize

IMG_20180905_173849 resize

IMG_20180905_173934 resize

IMG_20180905_174506 resize

IMG_20180905_174555 resize

IMG_20180905_175512 resize

IMG_20180905_175621 resize

IMG_20180905_180144 resize

IMG_20180905_180459 resize

IMG_20180905_181252 resize

IMG_20180905_181449 resize

IMG_20180905_181726 resize

IMG_20180905_182253 resize

IMG_20180905_182411 resize

IMG_20180905_182547 resize

IMG_20180905_182718 resize

IMG_20180905_182925 resize

IMG_20180905_183134 resize

IMG_20180905_183938 resize

IMG_20180905_184255 resize

IMG_20180905_184616 resize

IMG_20180905_184747 resize

IMG_20180905_185103 resize

IMG_20180905_185410 resize

IMG_20180905_191938 resize

IMG_20180905_191945 resize

IMG_20180905_192440 resize

IMG_20180905_204230 resize

IMG_20180905_205007 resize

IMG_20180905_210104 resize

IMG_20180905_211648 resize

IMG_20180905_212626 resize

IMG_20180905_212903 resize

IMG_20180905_213850 resize

IMG_20180905_214032 resize

And that leads me to the finished piece (already shown at the beginning):

Sayumi Michishige 1st attempt Stabilo pens resize

My thoughts on the Stabilo pens? So far I really love them. They leave beautiful marks and are resistant to my Copics too. Not only that but the color selection makes them quite useful for different applications. I’m definitely planning on upgrading my collection. The only downside is that they don’t seem to be refillable, but they’re not expensive so it’s not a big deal. Can’t wait to see what I can create with them.

-Bonus-

In any case, as I was writing this I had recently gotten off my other job and was happy to find a new video with members of Platinum Era Morning Musume, and that led me to another video that happened to give me a rather happy coincidence.

-By the way I use a dual monitor set up, left is my XP-Pen (that doubles as a monitor when not used for art) and my normal monitor on the right.

Anyway as I was watching this video I noticed that Sayu was looking right at them as they performed, I noticed this and found it funny and a coincidence as a certain number was happening. (I know I’m the only one finding pleasure and happiness in this but whatever).

Happy coincidence Sayu

Those who get it, get it.

Anyway, that’s this update.

Hasta la proxima,

-Nube


Painting Sayumi Michishige digitally with my new XP-PEN

On April 23 of this year I decided to take another plunge and buy an on screen graphics tablet. Of course one does have to be weary of anything that is cheap. So I was pondering first about buying a graphics tablet for a couple of years, then when I did have money saved up I began noticing the other options. At first I was thinking about getting the Wacom Cintiq 13HD, but I’m living in a time that new competitors are emerging in China. On top of that, they offer bigger sizes at around 1/3 of the price of Wacom’s 13 in. offering.  I decided to wait it out till a good amount of reviews and tests were done on them. A number of reviews seemed to be positive but there were not that many of them. Then at some point it seems like these products were being given away to Youtube artist so that they could “review” them (many of them were just unboxings). On top of that, they were always compared to Wacom Cintiqs (which is ok) but they tended to focus on it way too much. In the end these reviews really didn’t give me much confidence. Specially since I hadn’t used any on screen graphics tablet before so many of the points they were making I couldn’t really connect to.

One piece of advice I did connect to was that a bigger screen would work much better since I would have more space to work and wouldn’t have to be squinting or enlarging the image as much. So despite the countless positives of owning a Cintiq, I decided to bite the bullet and buy an XP-PEN Artist 22E ( it’s a 22-inch display graphic monitor). It’s strange, it is quite an expensive device so I almost felt bad about buying it. I even didn’t use it for a week, it just laid by my desk covered by my jacket. But at some point I decided to give it a try. Since this was my first graphics display I struggled a bit setting it up. But it’s actually quite easy when you know what you are doing. A quick tip is to set it all up is using the pen program used for this tablet. If this is your only display than you shouldn’t have a problem, but if you have a two display set up make sure you choose the XP-PEN as the correct monitor and also make sure it isn’t chosen as the extended option (this was the only thing that gave me a hard time). If it seems to not be working, remember that you should restart your computer after you install the driver and program.

I didn’t really want to write anything about this display till I had used it for a good bit. So far it has been two months, so I will document my experiences so far (I will do so in the future as well, I’m quite interested if this tablet will last me a good while or if it will only last for a year of something).

So far I’m content with it. I know a bit more about digital art, so now that I have this on screen graphics display I can work much faster since I’m actually drawing and painting on the canvas itself. One can get used to the other tablet like the Bamboo Manga I used previously, but nothing beats working on the artwork directly. And with the two monitor system I can work on the XP-PEN and look at my reference picture/s and even some sort of entertainment on my second monitor. It works quite great. I used to use my laptop to work on artwork, but now I’m using my PC that my brother gave me which is much more powerful and can take quite a beating (with all the programs I use simultaneously).

The monitor itself works quite well and seems to be of a good quality. In the reviews they talked a lot of paralaxing, but since I’ve never used a better display or really see it as a problem, I really don’t notice it. If I want to draw or paint somewhere the paint applies my paint where I want it. The on frame buttons are also quite useful and have increased my workflow. It came with a stand included that worked great but it took a good amount of my desk real state. So with that in mind I decided to invest in a monitor arm. But I was also weary of buying a cheap one that would break easily or would not move the way I need it to. After much thought and research I decided to go for the Amazon basics arm (in fact another reviewer of this display bought this arm which prompted me to give it a try). Now with this arm and the display I can work much better, more comfortable and faster. Before I was contemplating buying a wireless keypad and converting the keys into hot keys for the art programs like Photoshop. But with this set up I can have the display above the keyboard and away from my arms when I’m drawing and is easily accessible when I need to make a command.

One thing that really freaked me out was that the pen was leaving scratches on the display. I couldn’t really find much about it online, but I guess this is normal… These scratches also leave behind a rainbow effect on the screen but if you clean it off a bit it the rainbowing effect disappears so it really isn’t a problem. I wonder if a softer stylus tip exists? Whatever the case, after a while you don’t really notice it. I guess it’s one of those things where you get a new item and you are always weary of scratching it or something.

As for what can be done with it, that just depends on one’s skills.

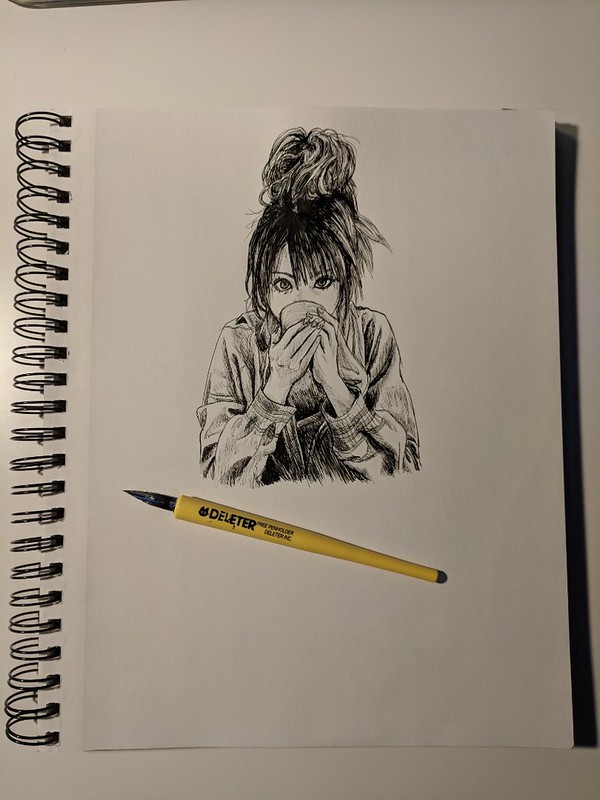
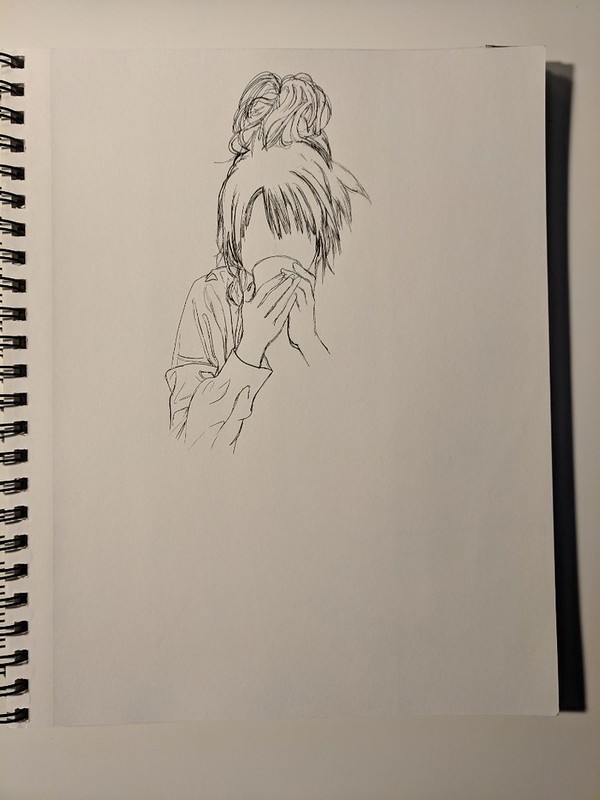
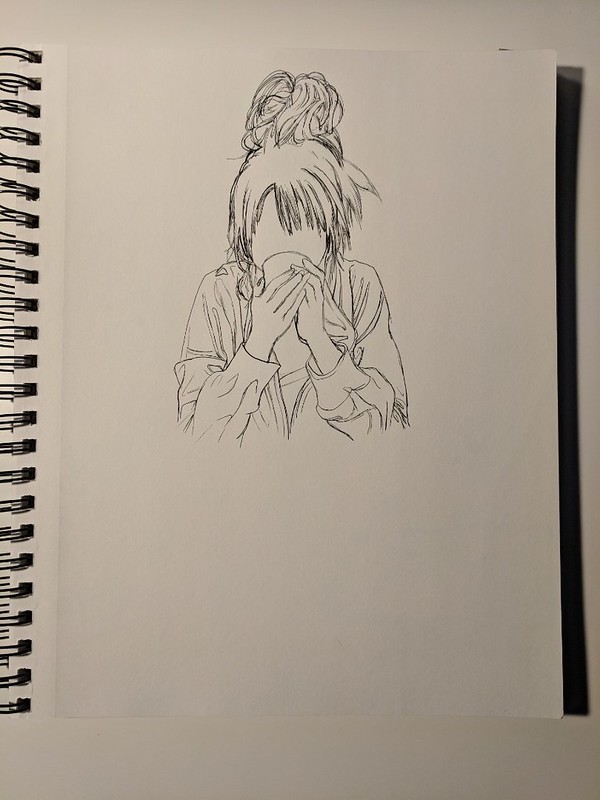
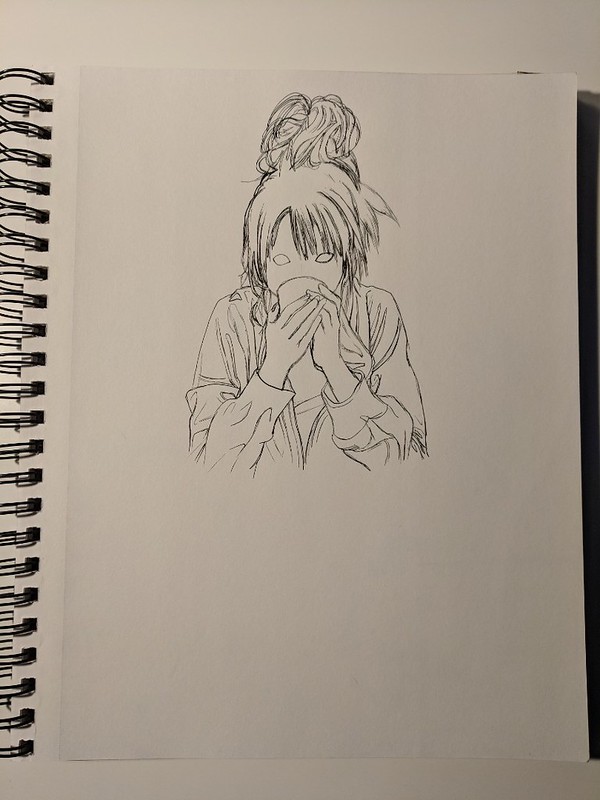
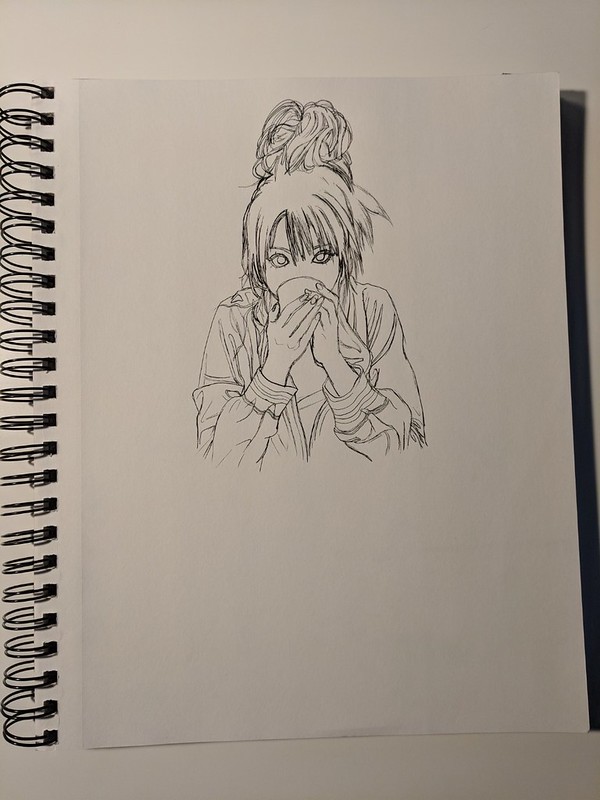
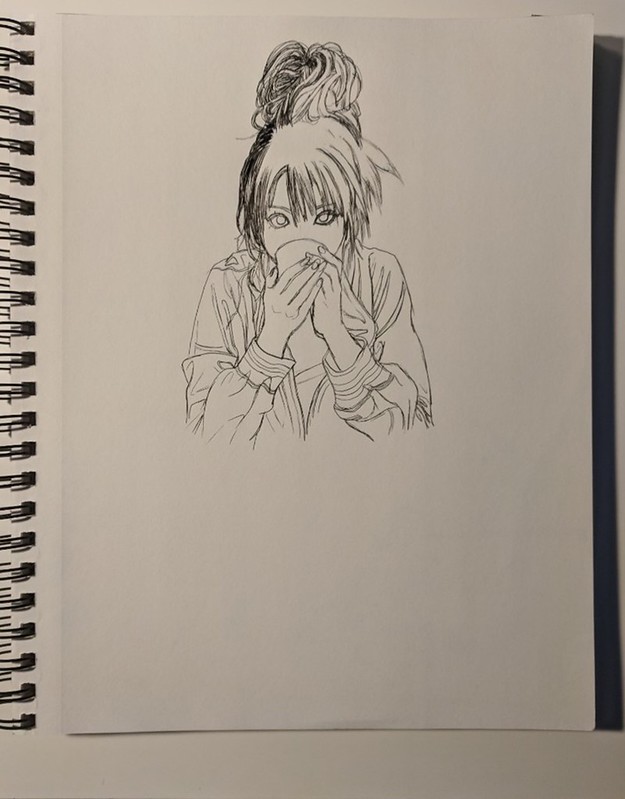
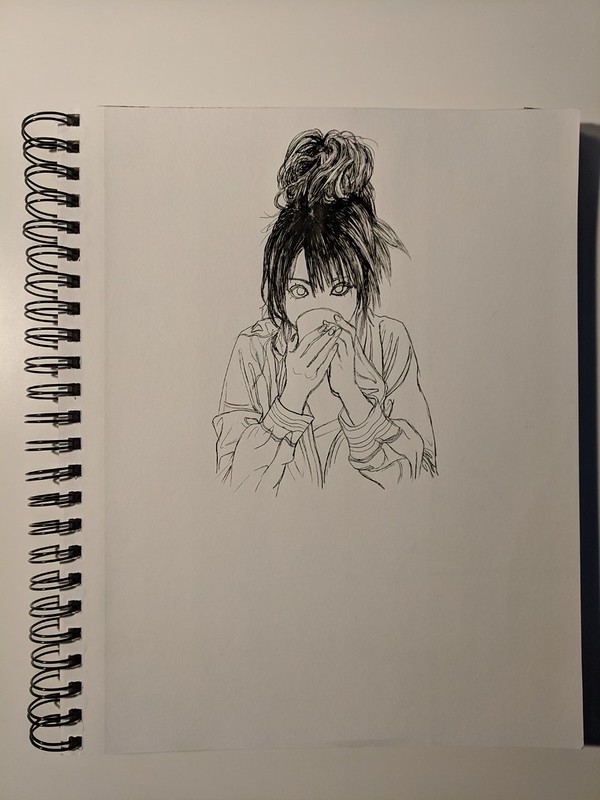
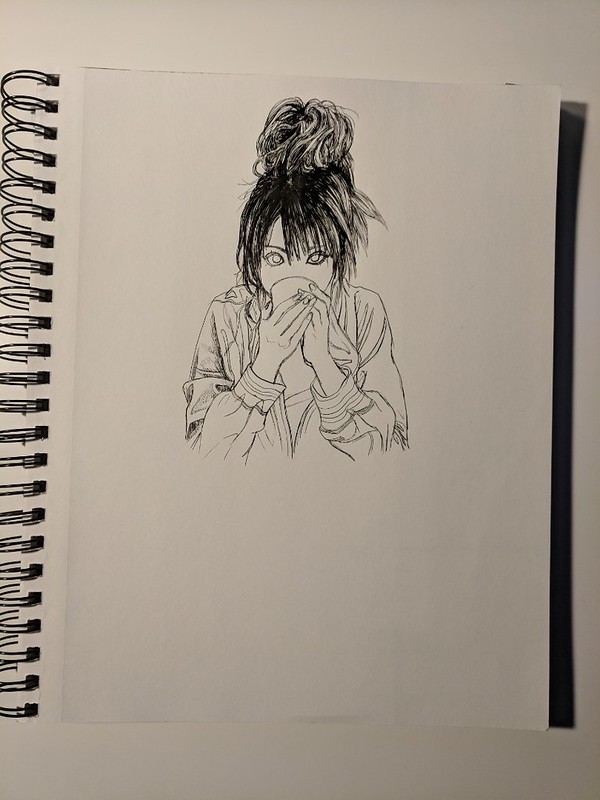
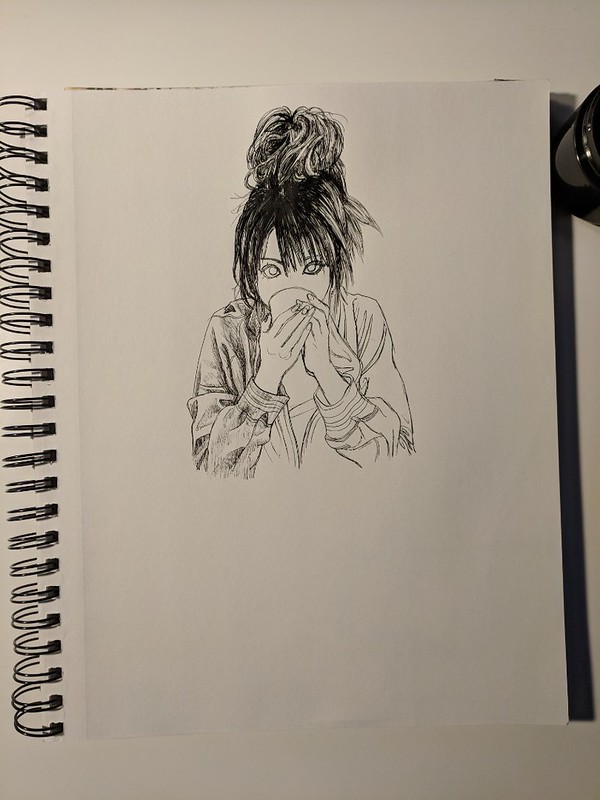
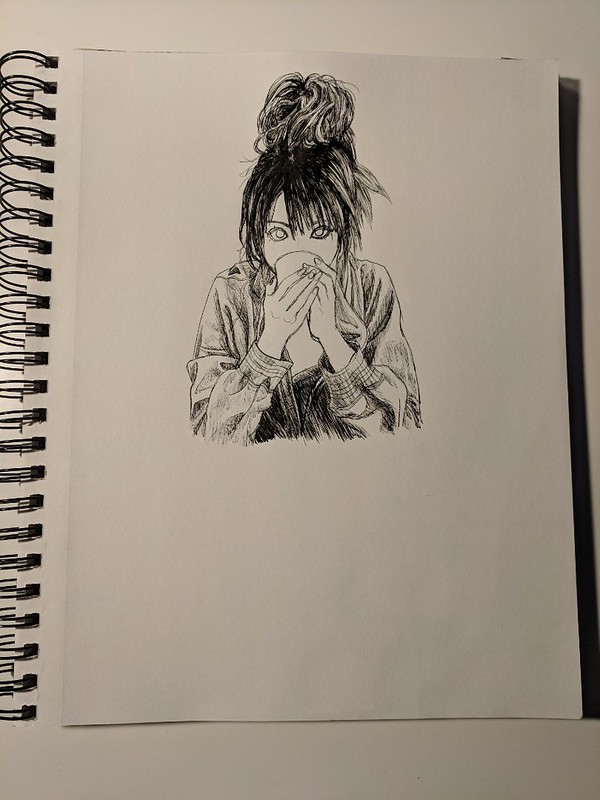
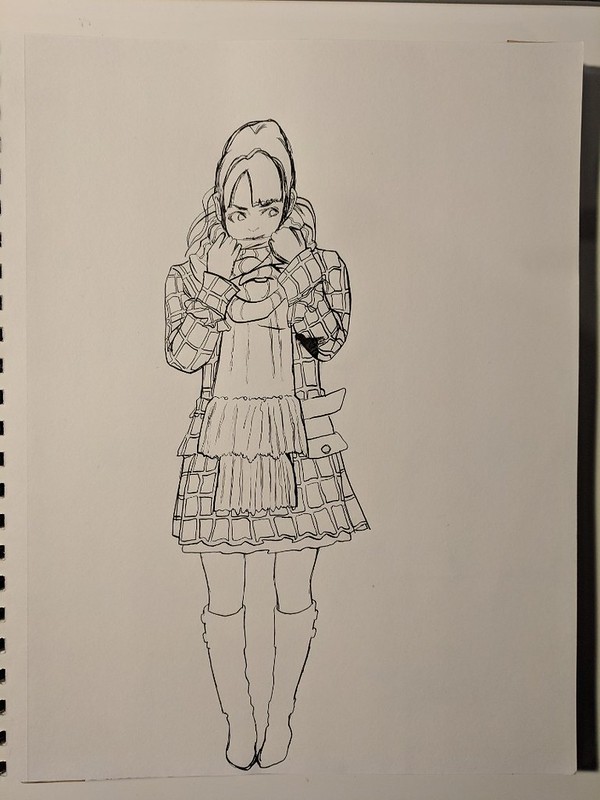
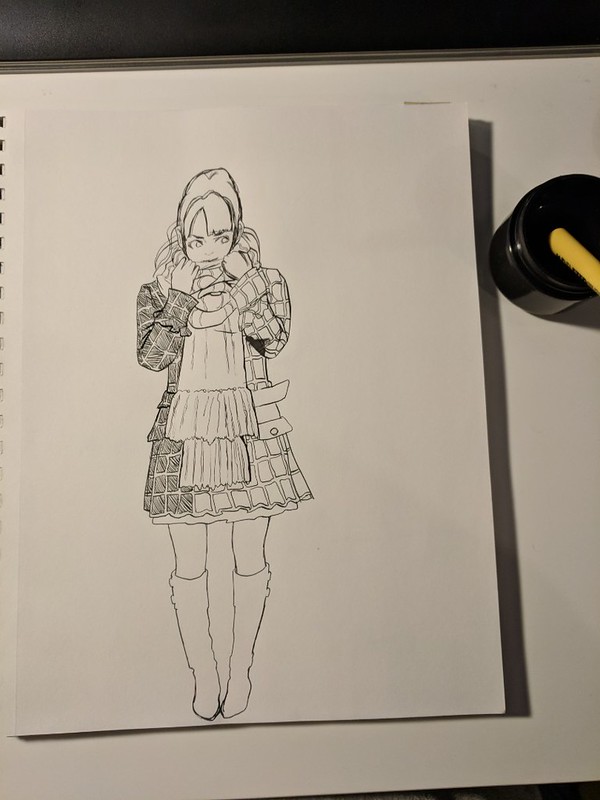
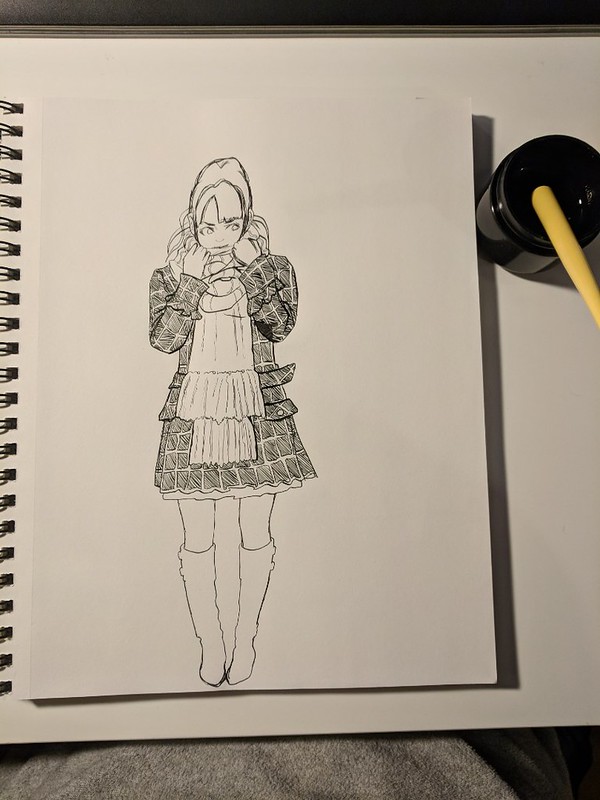
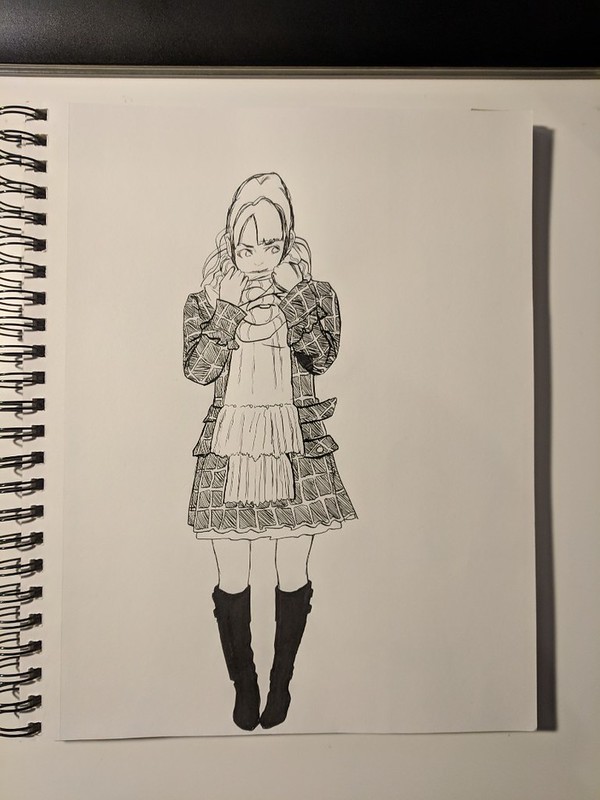
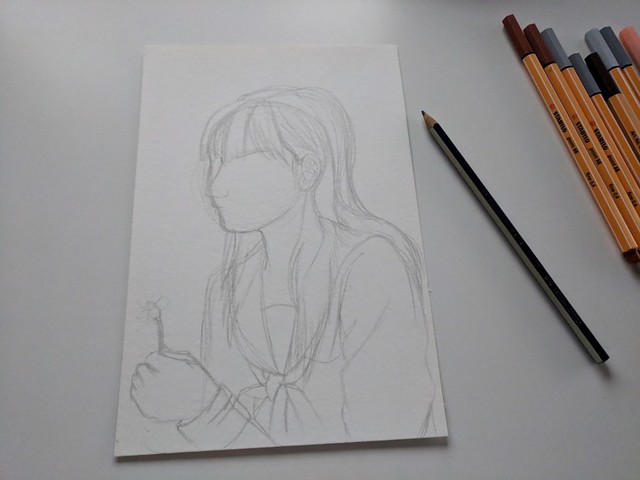
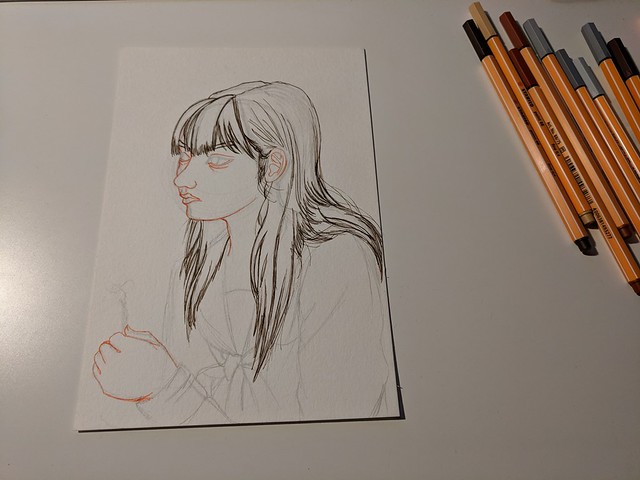
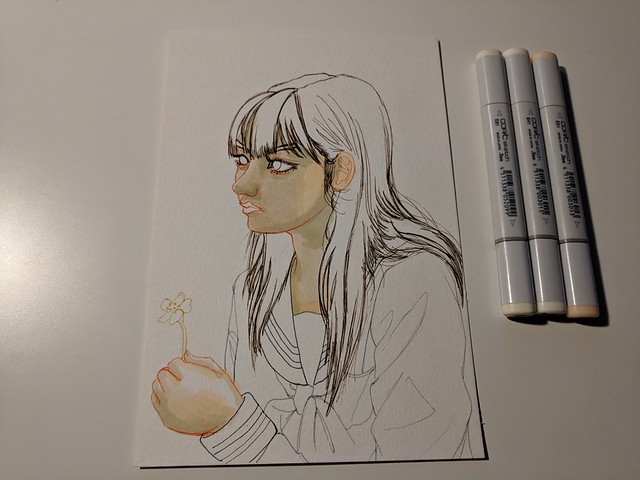
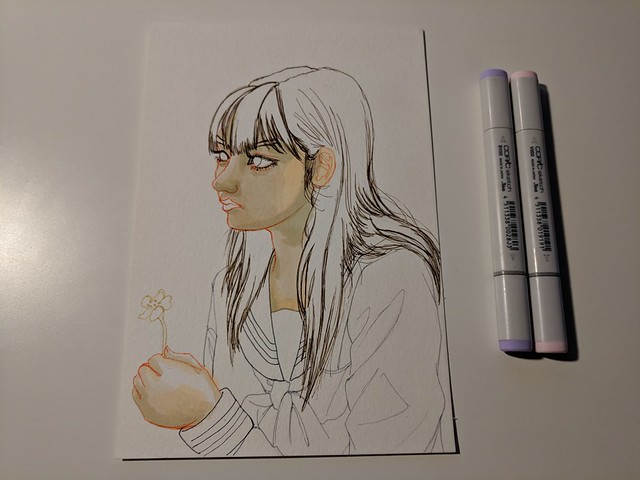
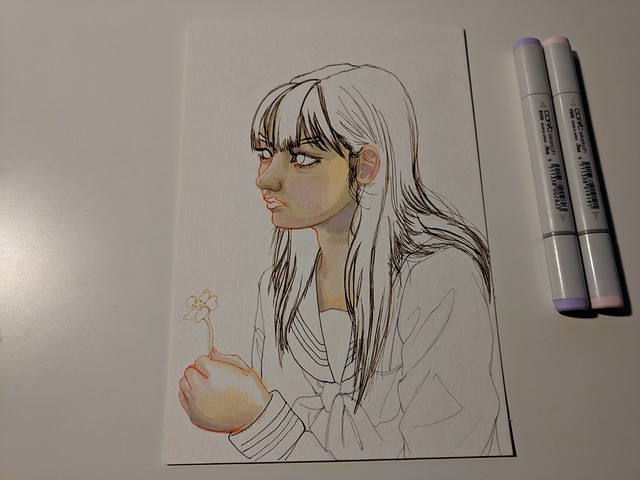
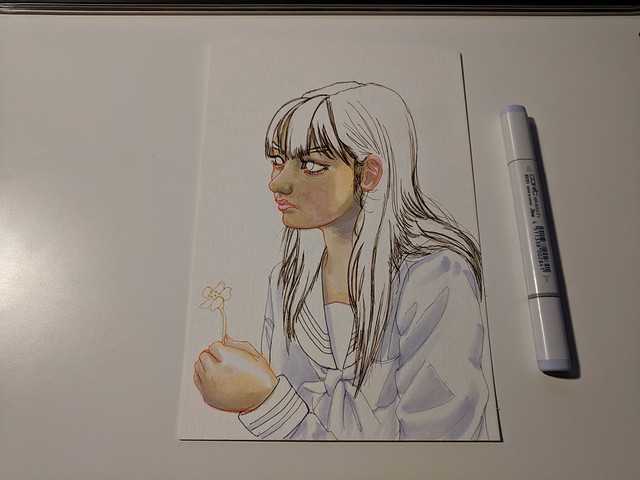
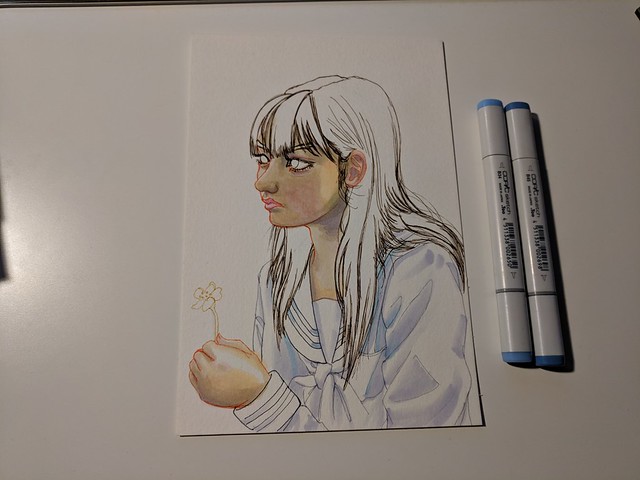
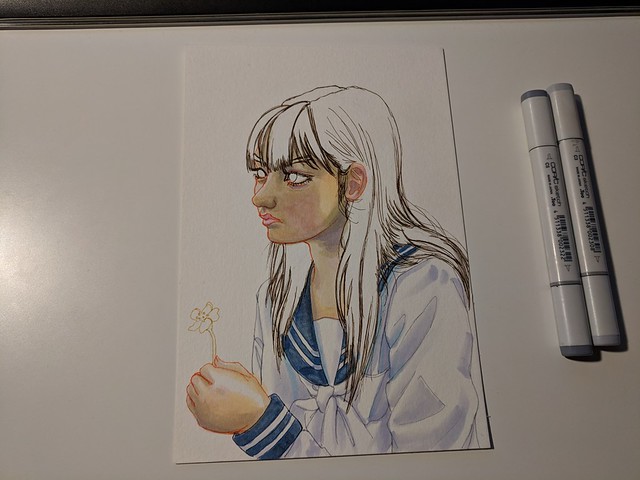
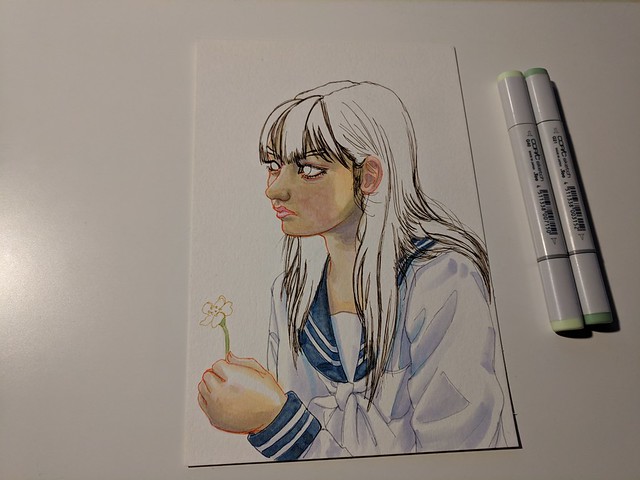
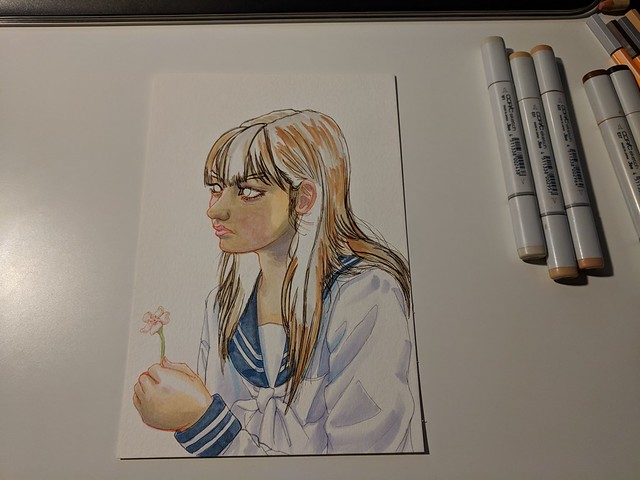
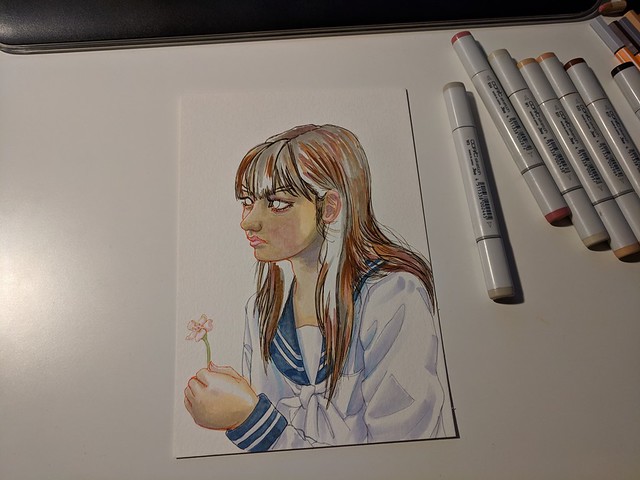
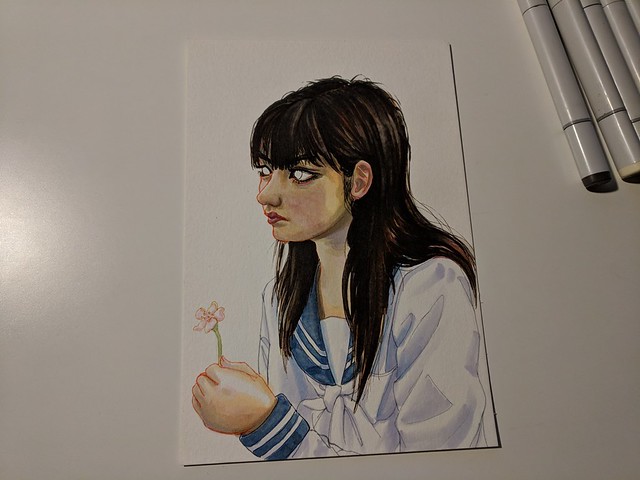
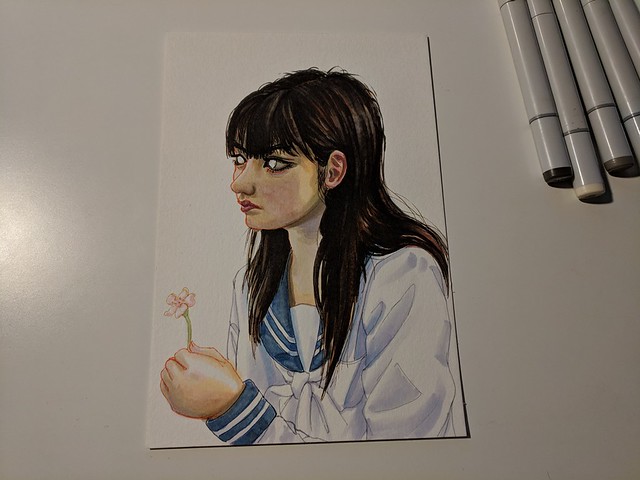
I chose Sayumi Michishige as my first model for my very first artwork on this tablet.

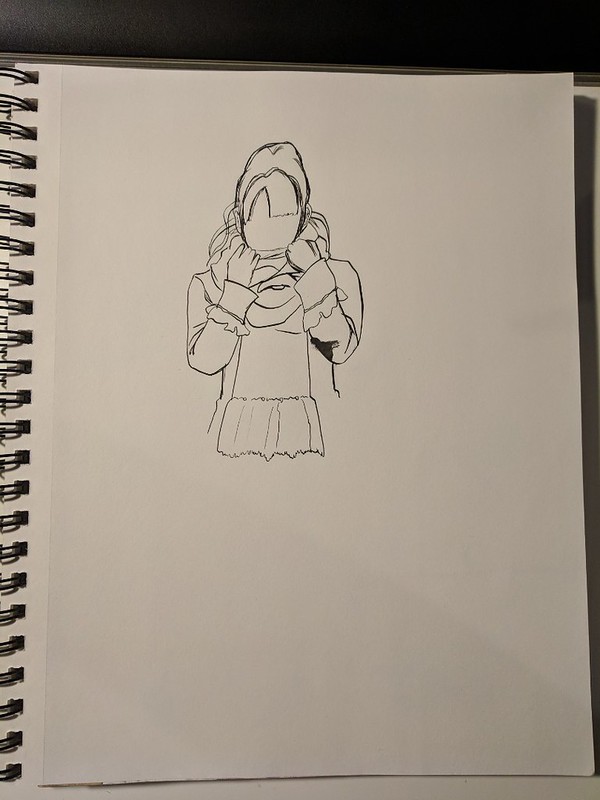
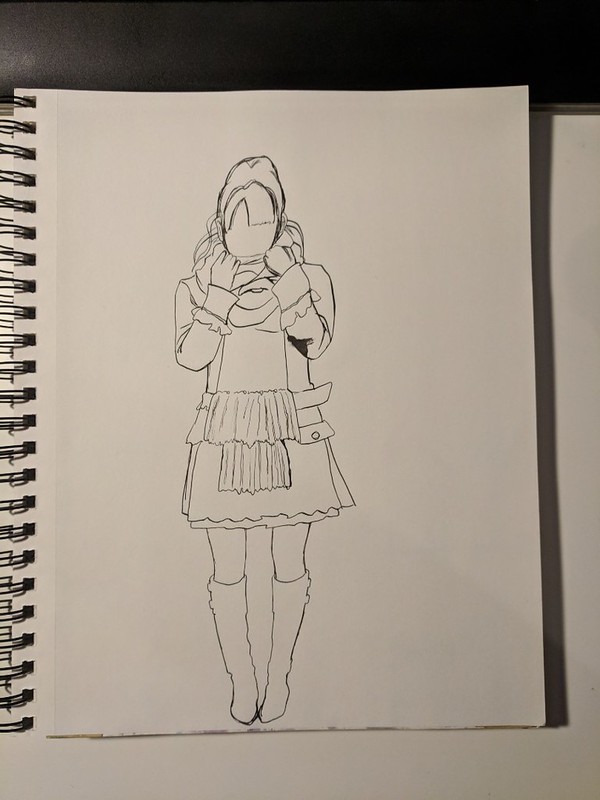
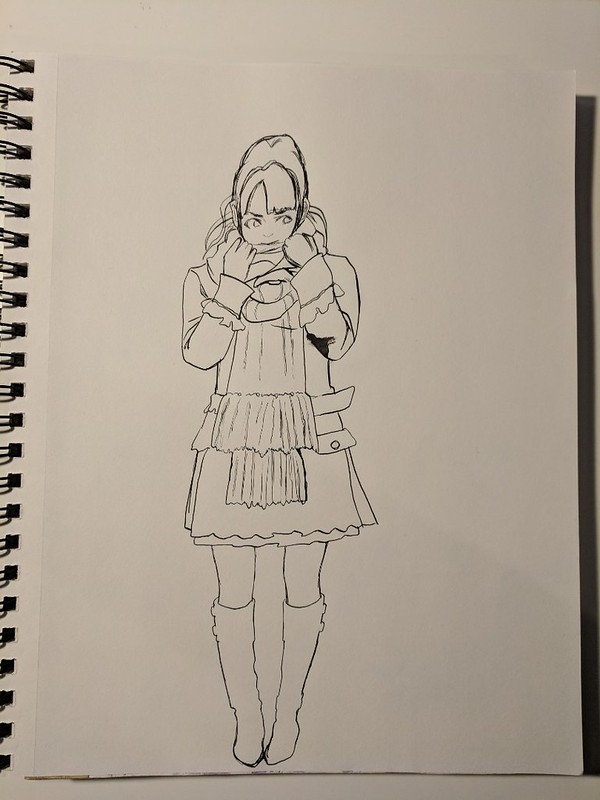
This is the reference picture I chose:

000096

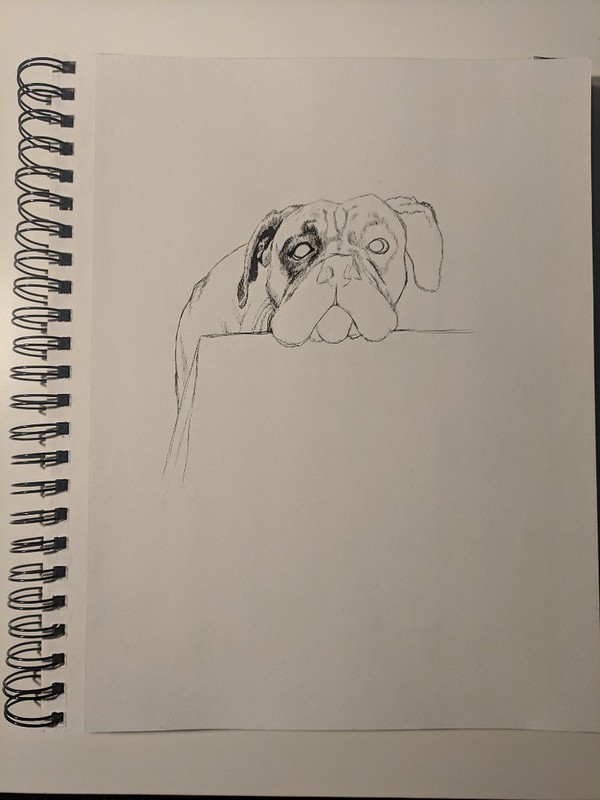
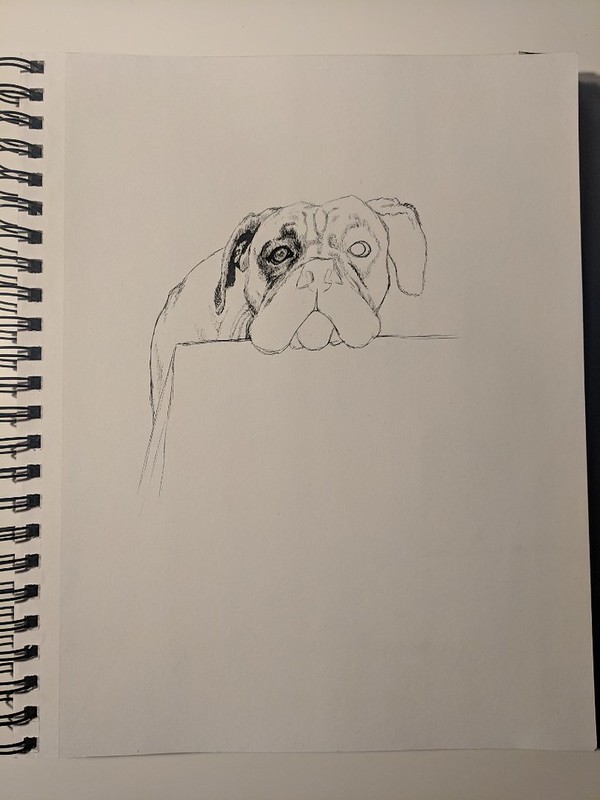
Here is what I managed to do with it, my first digital study:

Xp Pen Artist first artwork and try Sayumi Michishige with background resize

This was done on May the 18th. Since then I have been working some more work which I will upload soon.

So far I really love my new XP-PEN, but time will tell if it was a solid investment and will last me a good couple of years or if it’s a cheap “imitation” that will break in the near future. I’m hoping it it does last.

Hasta la proxima,

-NUBE

Cima Garahau 80s Shiseido like advertisement

Earlier this year I showed my youngest brother Gundam 0083 Stardust Memory (I also made sure he saw Top Gun first). After seeing it again I was really taken by Cima Garahau, she really is in my opinion the best part and most interesting character of the series (a shame things ended how they did).

One other thing I have really been into are Japanese 80s magazine ads. Over this year I was going crazy accumulating all the references I could acquire. Now my collection is around 1tb of pictures (this is going to be a pain to categorize…). But it is all worth it.

These are the references I used:

https://www.flickr.com/photos/darkcloudxero/41604180954/in/dateposted-public/

Sayoko Yamaguchi (pictured below):

https://www.flickr.com/photos/darkcloudxero/42326311871/in/dateposted-public/

https://www.flickr.com/photos/darkcloudxero/42279220572/in/dateposted-public/

https://www.flickr.com/photos/darkcloudxero/41424855725/in/dateposted-public/

Sayoko Yamaguchi (pictured below):

https://www.flickr.com/photos/darkcloudxero/42326322131/in/dateposted-public/

https://www.flickr.com/photos/darkcloudxero/40520064140/in/dateposted-public/

https://www.flickr.com/photos/darkcloudxero/27457481247/in/dateposted-public/

Up above are two pictures of Sayoko Yamaguchi who I came upon when finding reference pictures, I really feel that Cima looks a lot like her so of course I used her as part of the painting.

In any case, this piece was done both traditionally and digitally. First the painting of Cima. I wanted to emulate the painting style of the original anime and used my Knicker Poster Color paints to paint her but then used my Kuretake Gansai Tambi for the background. I wanted to loose details as I went further away from the focal point (which is Cima).

https://www.flickr.com/photos/darkcloudxero/28454114288/in/dateposted-public/

https://www.flickr.com/photos/darkcloudxero/40520424960/in/dateposted-public/

https://www.flickr.com/photos/darkcloudxero/28454114168/in/dateposted-public/

https://www.flickr.com/photos/darkcloudxero/40520424860/in/dateposted-public/

https://www.flickr.com/photos/darkcloudxero/28454114058/in/dateposted-public/

After finishing painting and scanning it I have to fix the colors since the scanning process dulls everything.

https://www.flickr.com/photos/darkcloudxero/41604614534/in/dateposted-public/

Once that is finished I then went ahead and started working on creating the ad. Since the main painting is done, now I had to paint the product. The hard part was coming up with what the ad would be promoting. After looking through Sayoko Yamaguchi’s reference pictures I noticed that she promoted Shiseido a good bit so after looking around a bit I decided to use their perfume line. And I painted it using Copics.

https://www.flickr.com/photos/darkcloudxero/40520848640/in/dateposted-public/

https://www.flickr.com/photos/darkcloudxero/40520848500/in/dateposted-public/

Once they were painted I then used my Gel Writer gel pens to write in the text and paint in the artwork. Thinking back I should have modified it more to make it more Gundam like, or at the very least modify it further.

https://www.flickr.com/photos/darkcloudxero/42327075091/in/dateposted-public/

https://www.flickr.com/photos/darkcloudxero/42327075241/in/dateposted-public/

After this I positioned them in place and modified them digitally by removing the modified Shiseido logo. I had to make a custom Cima Garahau text so that it would fit with the shiseido text style, and also modified their logo with a Zeon emblem that I also had to create by hand and modify digitally.

These are the original Shiseido text and emblem:

https://www.flickr.com/photos/darkcloudxero/41605114494/in/dateposted-public/

https://www.flickr.com/photos/darkcloudxero/42280250212/in/dateposted-public/

These are the ideas I had for the modifications I wanted to make:

https://www.flickr.com/photos/darkcloudxero/42327558171/in/dateposted-public/

https://www.flickr.com/photos/darkcloudxero/40521281620/in/dateposted-public/

Then I used this ad as inspiration to finish it all off (after modifying it of course).

https://www.flickr.com/photos/darkcloudxero/41605442824/in/dateposted-public/

And this is the final artwork.

Cima Garahau 80s Shiseido perfume ad resize


Hasta la proxima,

– NUBE

Nicker poster color 2nd attempt done in 1/15/18

School is just about done… it was quite a tough end of the month in April and the beginning of May, but I managed to power through. Now I should be a bit more free.


Quite a while ago I decided to buy a 24 color set of Nicker Poster Color paints. I read about how Ghibli uses them because they dry quickly, and I can confirm that. On top of that I can make the colors translucent or opaque depending on what the ratio of paint to water is. I haven’t had much time to practice much with them because of school and the construction work, but I did try some whenever I could. This one was done before I started school this semester, but wanted to talk about it a bit before posting it. I just didn’t think it would take about 5 months…

I would say that for a self taught artist, the best way to learn is to try and recreate other peoples work and try to understand their process and color choices. With that in mind, it shouldn’t be too surprising that I decided to recreate a background done by Kazuo Oga, the background artist for Studio Ghibli.

I decided to choose this image for my study                                                                              (it’s from “Only Yesterday”/”おもひでぽろぽろ”):

03-Only-Yesterday

I thought that I had documented the process, but thinking back I guess I was just focusing on painting.

As can be seen I didn’t really keep the proportions in place so I just focused on recreating the colors.

Ghibli Background Study 1st Attempt cropped resize

There’s an obvious difference in skill and color. But I was amazed at the versatility of the Nicker paints. I wonder just how far I can push them.

That will be all for now.

Hasta la proxima,

-NUBE

Some of the artwork I’ve been practicing 3-31-18

As mentioned before I said I was going to be uploading some artwork that I’ve been working on as a bit of practice so here it is (sorry about the delay, like usual the workload has been a bit of a pain but I’m pushing forward – luckily this semester is almost finally over… though construction work seems to be looking to increase).

I got a Samsung tablet for my self at the end of last year and didn’t really use it all that much, but while in a dollar store I saw a tablet stylus and decided to try it out. I was surprised at the accuracy I could get with such a clunky pen, so I ended up purchasing an app to do some art on the tablet. Sadly the tablet is not that powerful so it stuttered way too much while I was working on it and it even crashed plenty of times but it did get me interested on the possibilities of drawing/painting digitally directly. Though one can get used to looking up at the monitor using a normal drawing tablet, there is no comparison to actually looking at what you are drawing/painting. Now I’m really craving a drawing monitor…

Anyway here are two tries I made while waiting for my class start;

First try:

https://www.flickr.com/photos/darkcloudxero/41103228712/in/dateposted-public/

Second try:

https://www.flickr.com/photos/darkcloudxero/41103228612/in/dateposted-public/

On the traditional side of things I wanted to make some quick practice sketches with a pen. And not surprisingly the ink really made it standout and look cleaner than when using a pencil.

I wanted to try a conversion from a real person to an anime version so I decided on using this reference picture of Eri Kamei to try it out:

kamei024

I decided to only do the main lines to test out how it all looks.

This time I used a pen from the brand LePen, I want to test out how a lighter pen combines with color so I used their Dark Grey color which leaves a much lighter mark that I hope combines much better when I add watercolor and copics to it.

https://www.flickr.com/photos/darkcloudxero/27273111068/in/dateposted-public/

After I did the outline I wanted to see what would happen if I added more detail and darker lines, but my skill are still… anyway I’ll figure it out by doing some more when I have the chance. For the thicker lines I used one of those ink pens from Hobby Lobby that are meant for calligraphy. Did not end up how I wanted it…

https://www.flickr.com/photos/darkcloudxero/39337424070/in/dateposted-public/

But despite all this it does give me a good opportunity to try out if I can conceal mistakes using my Knicker Poster Color white, it does work but I have to gauge the right amount so as to make it thick enough to cover but not thick enough to make a mess. What I do know is that the thinner lines looked much better, I’ll have to figure out how to ink and shadow properly.

https://www.flickr.com/photos/darkcloudxero/27273110408/in/dateposted-public/

Next is Yuri Kim from Fearies Landing, here is the reference picture:

https://www.flickr.com/photos/darkcloudxero/40251652515/in/dateposted-public/

Here is the main outline.

https://www.flickr.com/photos/darkcloudxero/26274808197/in/dateposted-public/

I inked some sections and added some details but not much since I didn’t want to use too much time on it. I’ll practice some shading techniques on a blank paper to figure out what kind I should use and at what time.

https://www.flickr.com/photos/darkcloudxero/26274808087/in/dateposted-public/

Currently I’m trying to make a new finished piece, but I’ll leave that for another time.

Hasta la proxima,

-NUBE

DarkCloudXERO Let’sDraw Episode 2 Featherine Augustus Aurora

It seems like I can make videos much faster having finished the base work. But they still take a good bit of time…

Luckily I have this one done and I have finished most of my school work so I should finally have some time to work on some personal artwork (oh yeah and spring break is next week)!.

Video requested by: Ayoub Barakat

reference picture: https://www.flickr.com/photos/darkcloudxero/40750071082/in/dateposted-public/

Didn’t get any special instructions for this video so there really isn’t any commentary (aside from the introduction, this one blunder during the video and the ending). If you guys have any questions let me know.
Whenever I don’t get special instructions I will just re-draw some of the official work that is out there.

Music used is vaporwave and Future Funk. I tried contacting the artist but they haven’t replied. I’ve also notice that some videos have been removed by the original record labels that these songs were sampled from. So this video might get taken down. For now it is just a test, so this music format might change.

Videos aren’t monetized and while uploading I already got claimed, but it seems like I can keep the video up, though they will make whatever monetization this video makes. So whatever ads appear aren’t placed by me.

Music can be found here (formated as Artist – Album):

Night Tempo – Soundcloud Collection
https://nighttempo.bandcamp.com/album/soundcloud-collection

YUNG BAE – Bae: Side B
https://yungbaebae.bandcamp.com/album/bae-side-b

YUNG BAE – BA3
https://yungbaebae.bandcamp.com/album/ba3

A series of videos where I help people draw. I make these videos on requests. So if you need help drawing someone or something, leave a message.


-XERO

DarkCloudXERO Let’sDraw Episode 1 Misaka MIkoto cool eyes

Video is finally up.

School and work sure dragged things out longer than it should have…

Plus all the new opening and closing animations were pretty time consuming. But that was all groundwork that I can now just edit for the new videos. One thing that will probably set me back still is recording commentary for the videos. That I’m not used to at all. Hopefully I learn to relax when recording so that I can do it faster and with little mistakes. We’ll see…

These are the reference pictures:

cosplayer:

https://www.flickr.com/photos/darkcloudxero/40792752271/in/dateposted-public/

“cool eyes”:

https://www.flickr.com/photos/darkcloudxero/40792752651/in/dateposted-public/

https://www.flickr.com/photos/darkcloudxero/40792753391/in/dateposted-public/

https://www.flickr.com/photos/darkcloudxero/39897964515/in/dateposted-public/

hair:
https://www.flickr.com/photos/darkcloudxero/39897965105/in/dateposted-public/

I tried a couple new things for the way I presented the video such as having the reference pictures appear as needed and zooming in and out of the sections that I would be drawing. Hopefully that becomes useful for those who use my videos to learn how to draw (and entertaining for those who just enjoy watching these types of videos).

I think I will just draw for this videos (there may be special exceptions from time to time, it depends on how good and fast I become) so that I can make them quickly and specially so that I can work on my own projects on the side, which I haven’t really had much time to do (though I do have some that I want to show you guys soon).

As for music, I’m really into Vaporwave and Future Funk (specially City Pop which is where Vaporwave/Future Funk sampled their songs from). Just as this video was uploaded I got a couple of copyright claims for the music used in the videos. Which I expected. I’m not really going to rely on Youtube monetarily, I already got denied that ability since my videos and subscriber count weren’t high enough according to their new guidelines. So these videos are really more of a hobby. Hopefully people do learn from them, because I know I have doing them (in more ways than one).

In any case, the music can be found here (formated as Artist – Album):

Yung Bae – BAE :
https://yungbaebae.bandcamp.com/album/bae

Yung Bae – Japanese Disco Edits :
https://yungbaebae.bandcamp.com/album/japanese-disco-edits

Nanidato – Mobile Sailor Gundam :
https://nanidato.bandcamp.com/album/mobile-sailor-gundam

Night Tempo – Pure Baby Maker [Rewind] :
https://neoncityrecords.bandcamp.com/album/pure-baby-maker-rewind


Name of the songs are in the video itself.

That should be it for now, I’m currently working on a new project for school which requires me to read another book. But at least I don’t have to do another powerpoint presentation again so it shouldn’t be too bad (though I still have to write another paper about it). Aside from that I am going to be working on another video as well. I already recorded so it’s just a matter of editing which should’nt be too bad, it’s the recording of my voice that really gets me. But if I don’t do it I wont get better, so I just have to grit my teeth and do it.

As mentioned before I did work on some new art pieces, nothing really new, they are just practice pieces. I will upload and talk about them later.

Hasta la proxima,

– NUBE

Create a website or blog at WordPress.com

Up ↑