
About a month ago I was asked to make a video of the setup I use to make my youtube drawing videos. Sadly I was quite busy until recently with school and some projects that will be incorporated into youtube and this page as well of course. I think it would be much easier to just do a quick guide here instead of making a video. The process isn’t really all that hard, and setting things up usually just needs the things lying around the house.
Anyway I’m sorry Caio Mitsukayro, I really wanted to make this sooner. Hopefully it will still be of use to you.
Here are some pictures so that you can get a feel of how it looks:
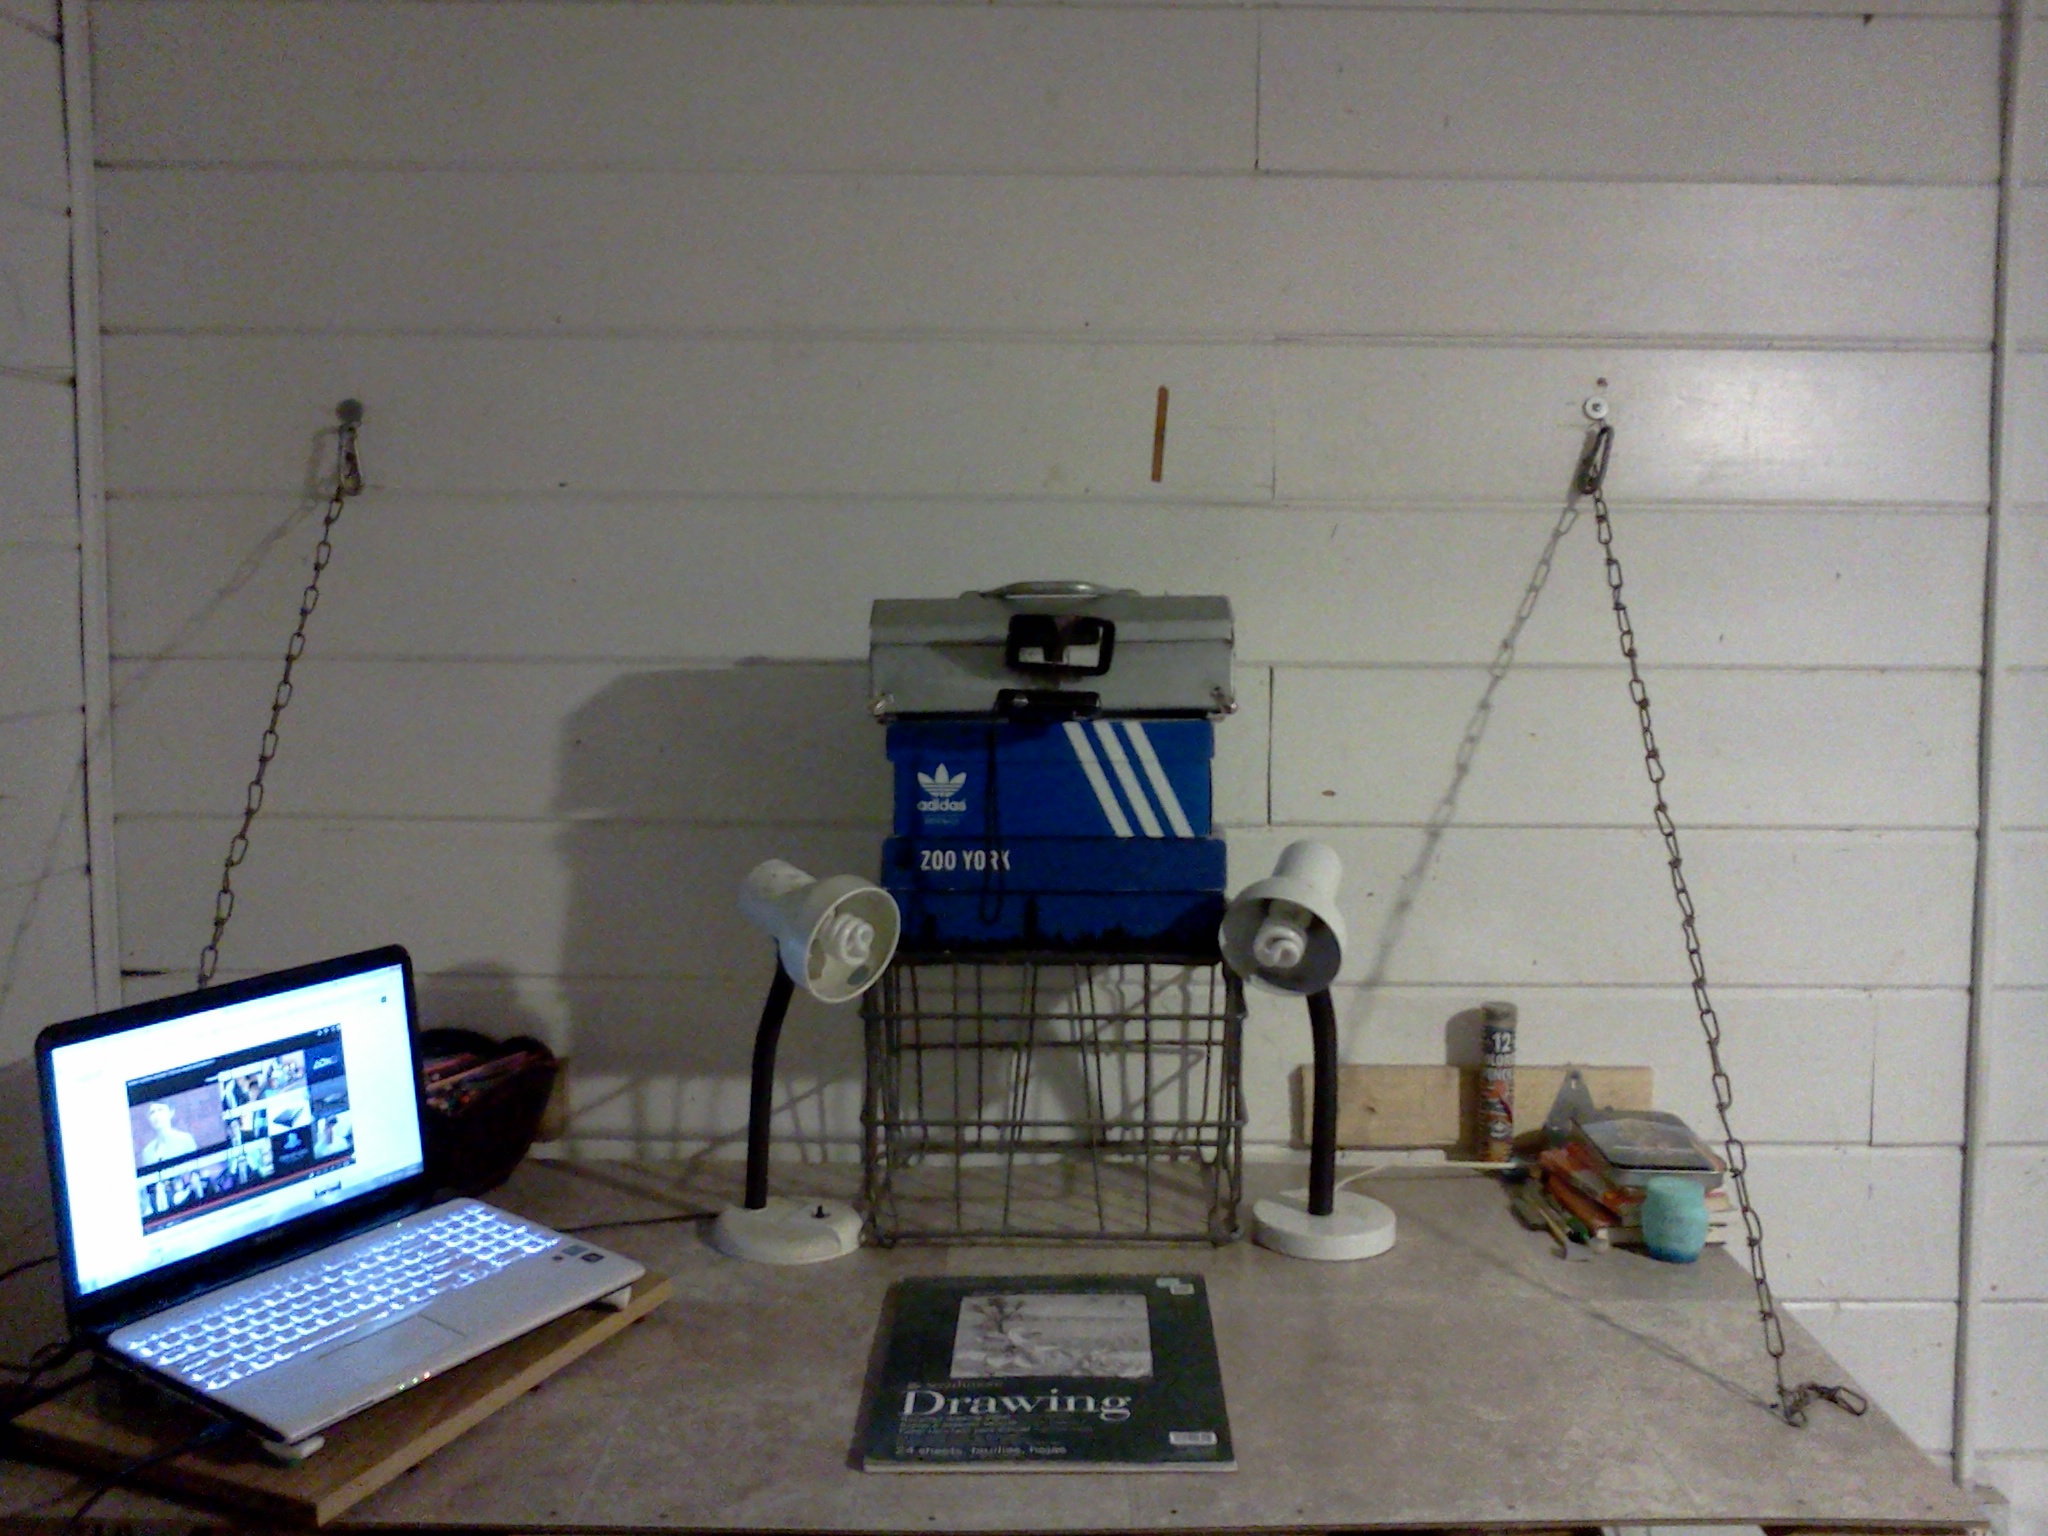
My room seriously needs another paint job, but ignore that for now. Below is a closer shot:
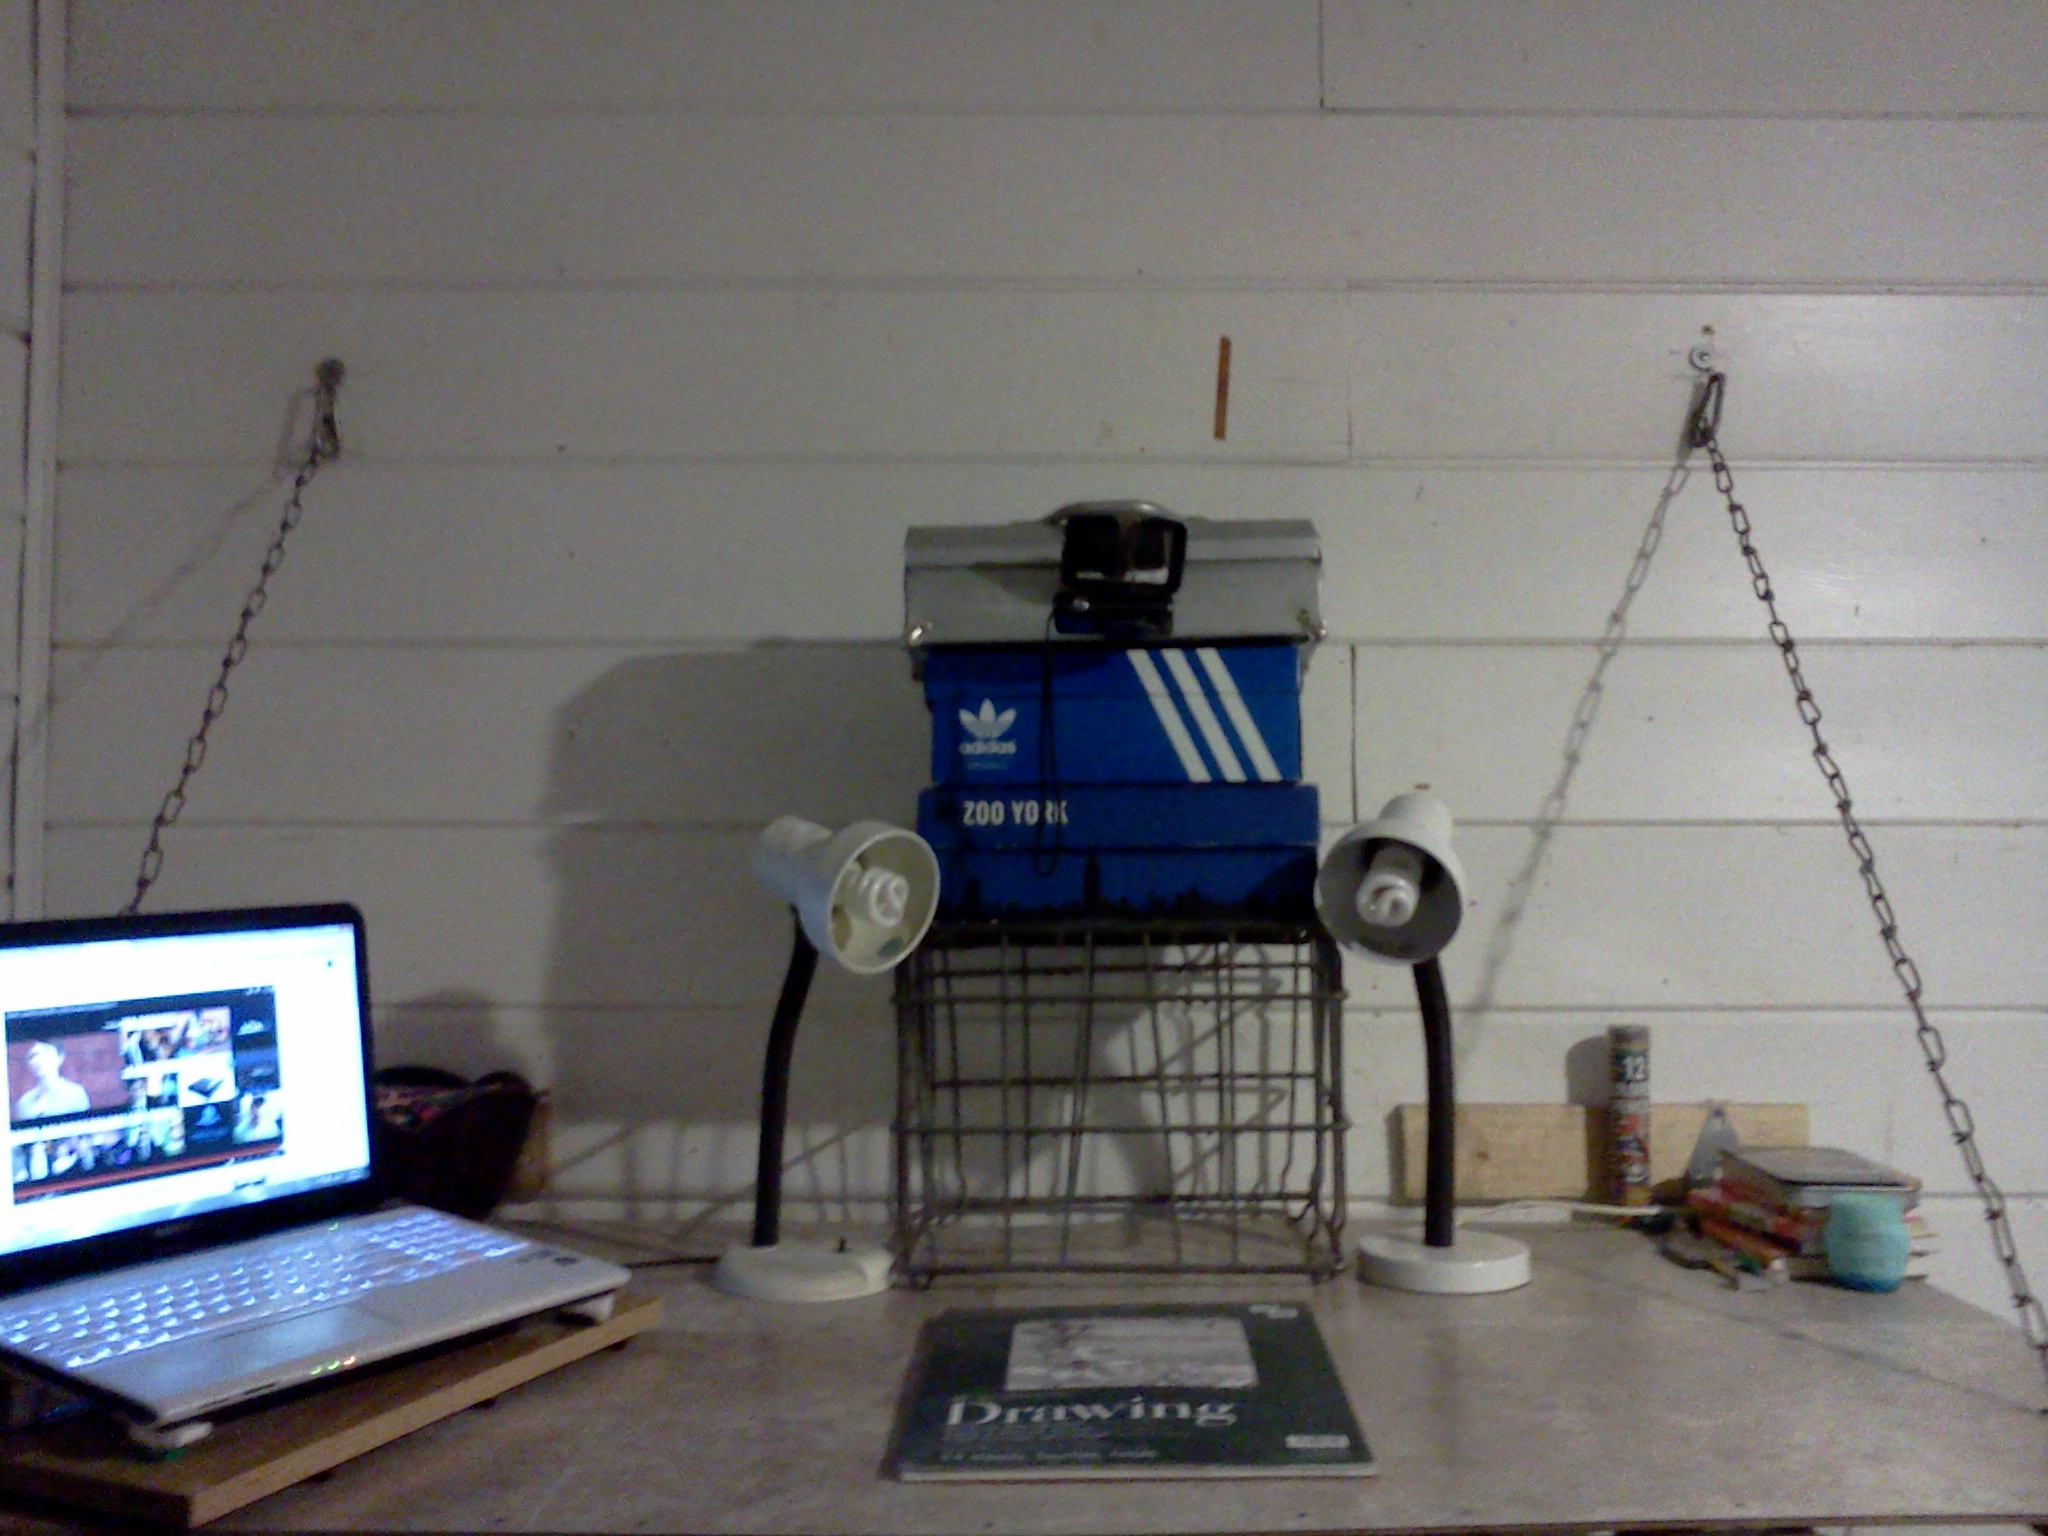
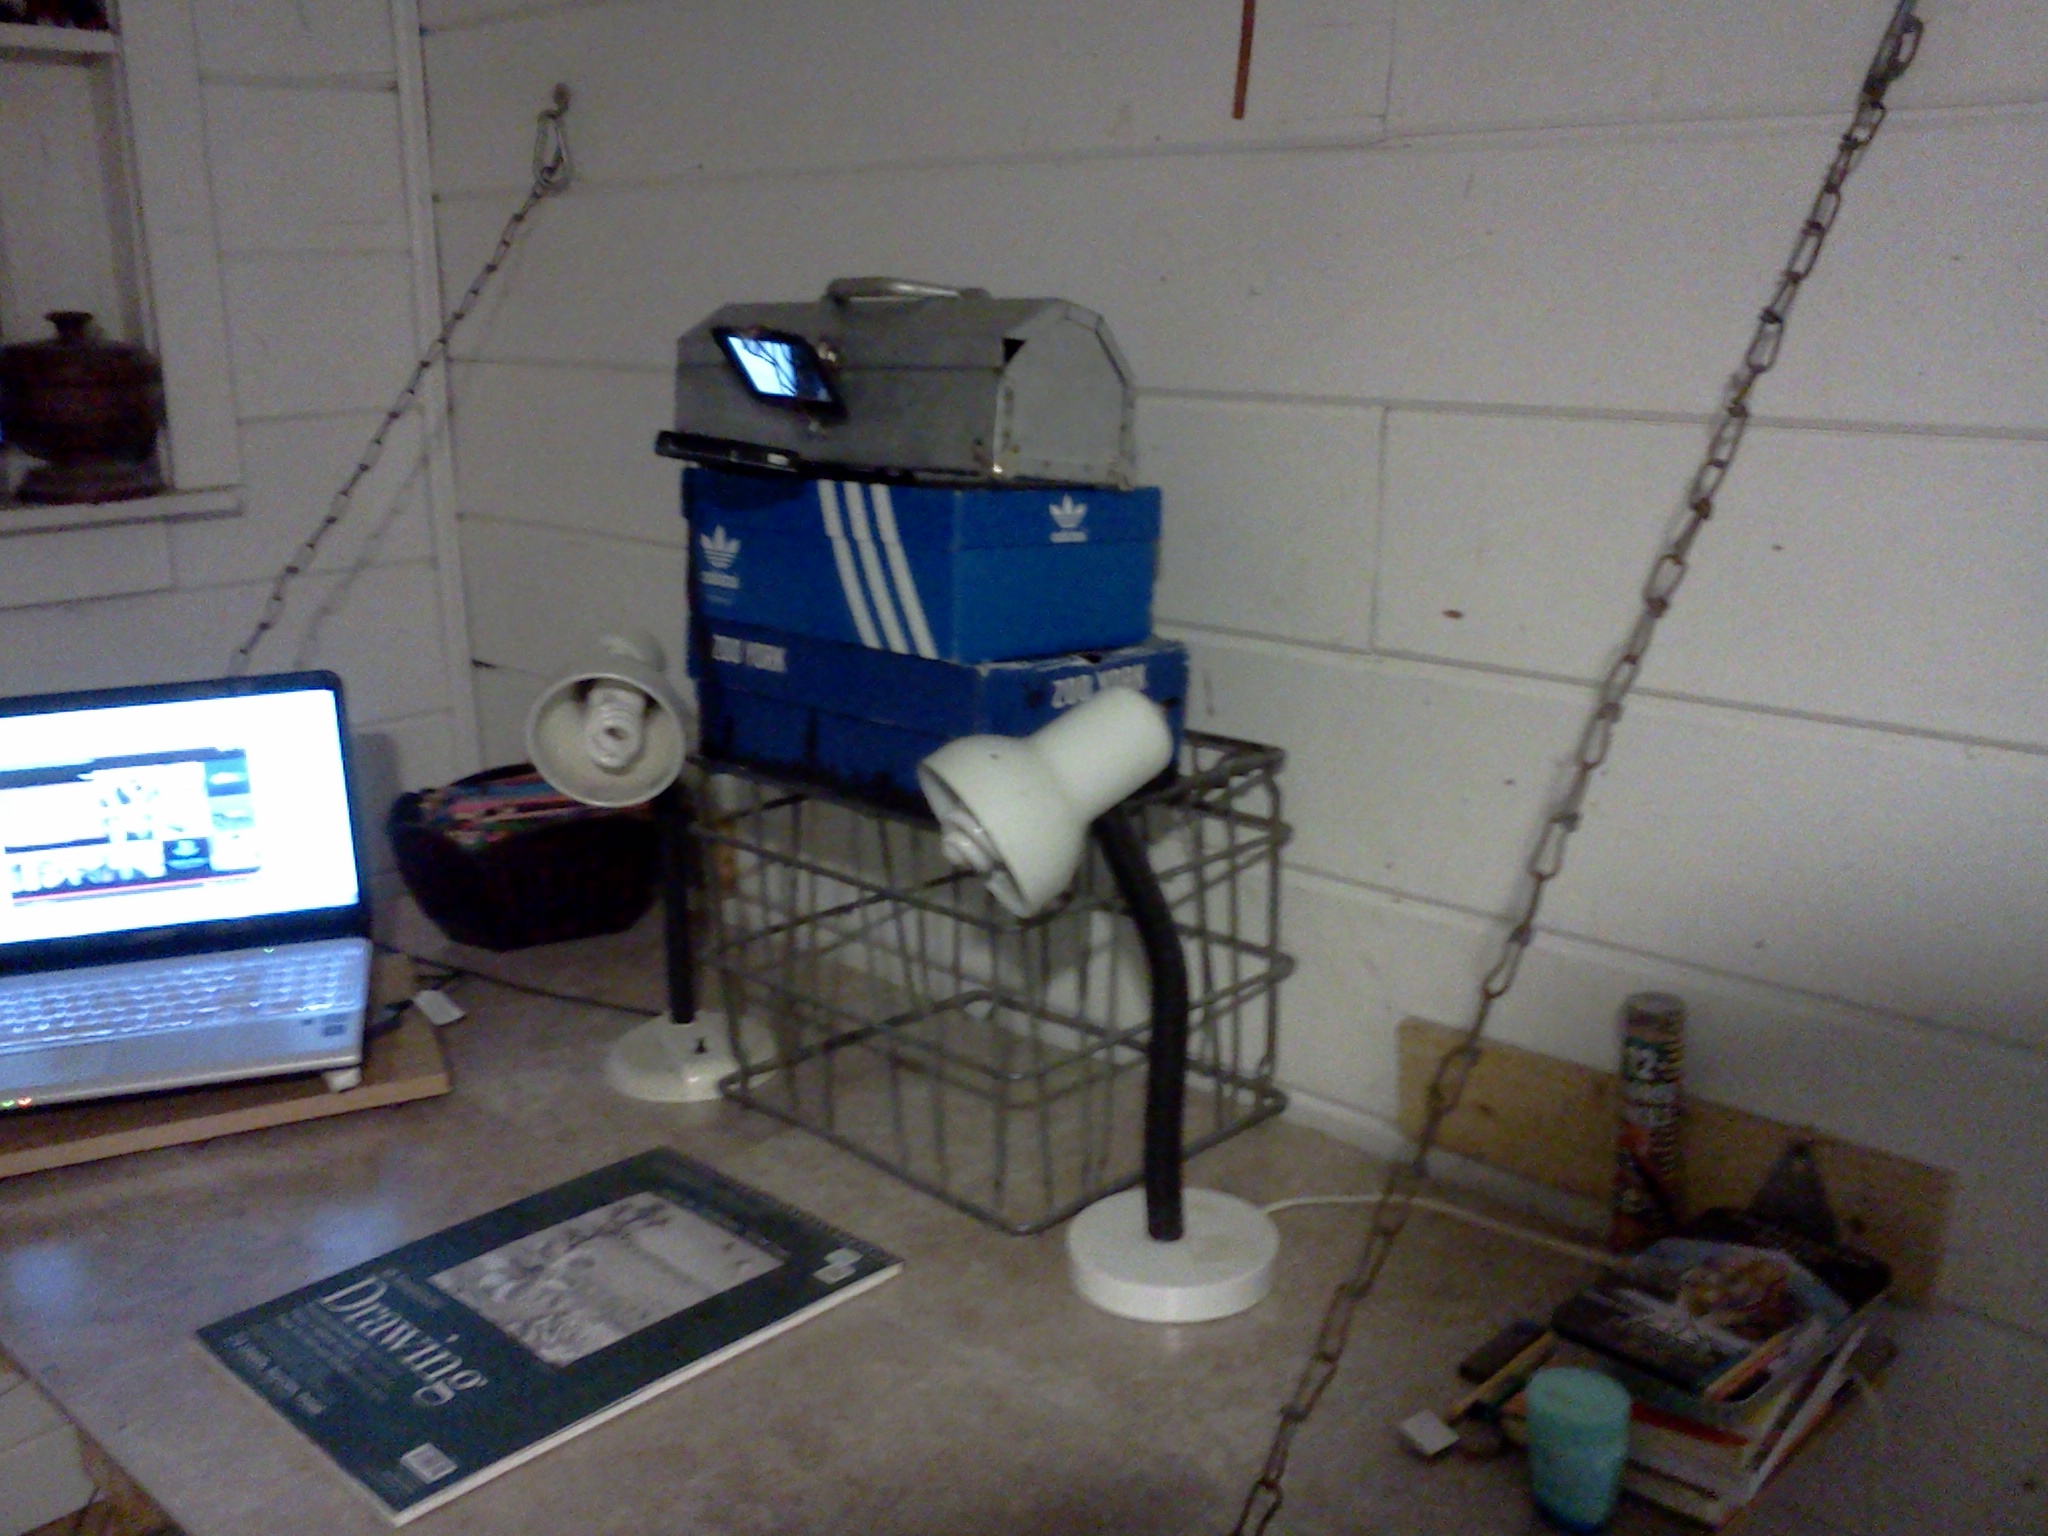
I don’t know if you can tell, but that is my camera up there in between the boxes. Currently I am using a Cybershot, I really don’t regret buying it.
As you can tell, I have my laptop right next to me. It’s really helpful in case I need a couple of references or if I want to hear music as I draw. I won’t deny it, but most of the time I’m also watching something online as I draw (usually late night shows, well that’s a lie. I only watch Craig Ferguson if it’s a late night show…). In any case the desk was created by me at the end of last year. It’s nothing fancy but it does it’s work. It can actually fold up and become part of the wall to give me more room when I need it. It was chains so that I could ignore the legs, this makes it easier to move around when I need to step away from the desk, or I need to fold it up (I rarely do it though.).
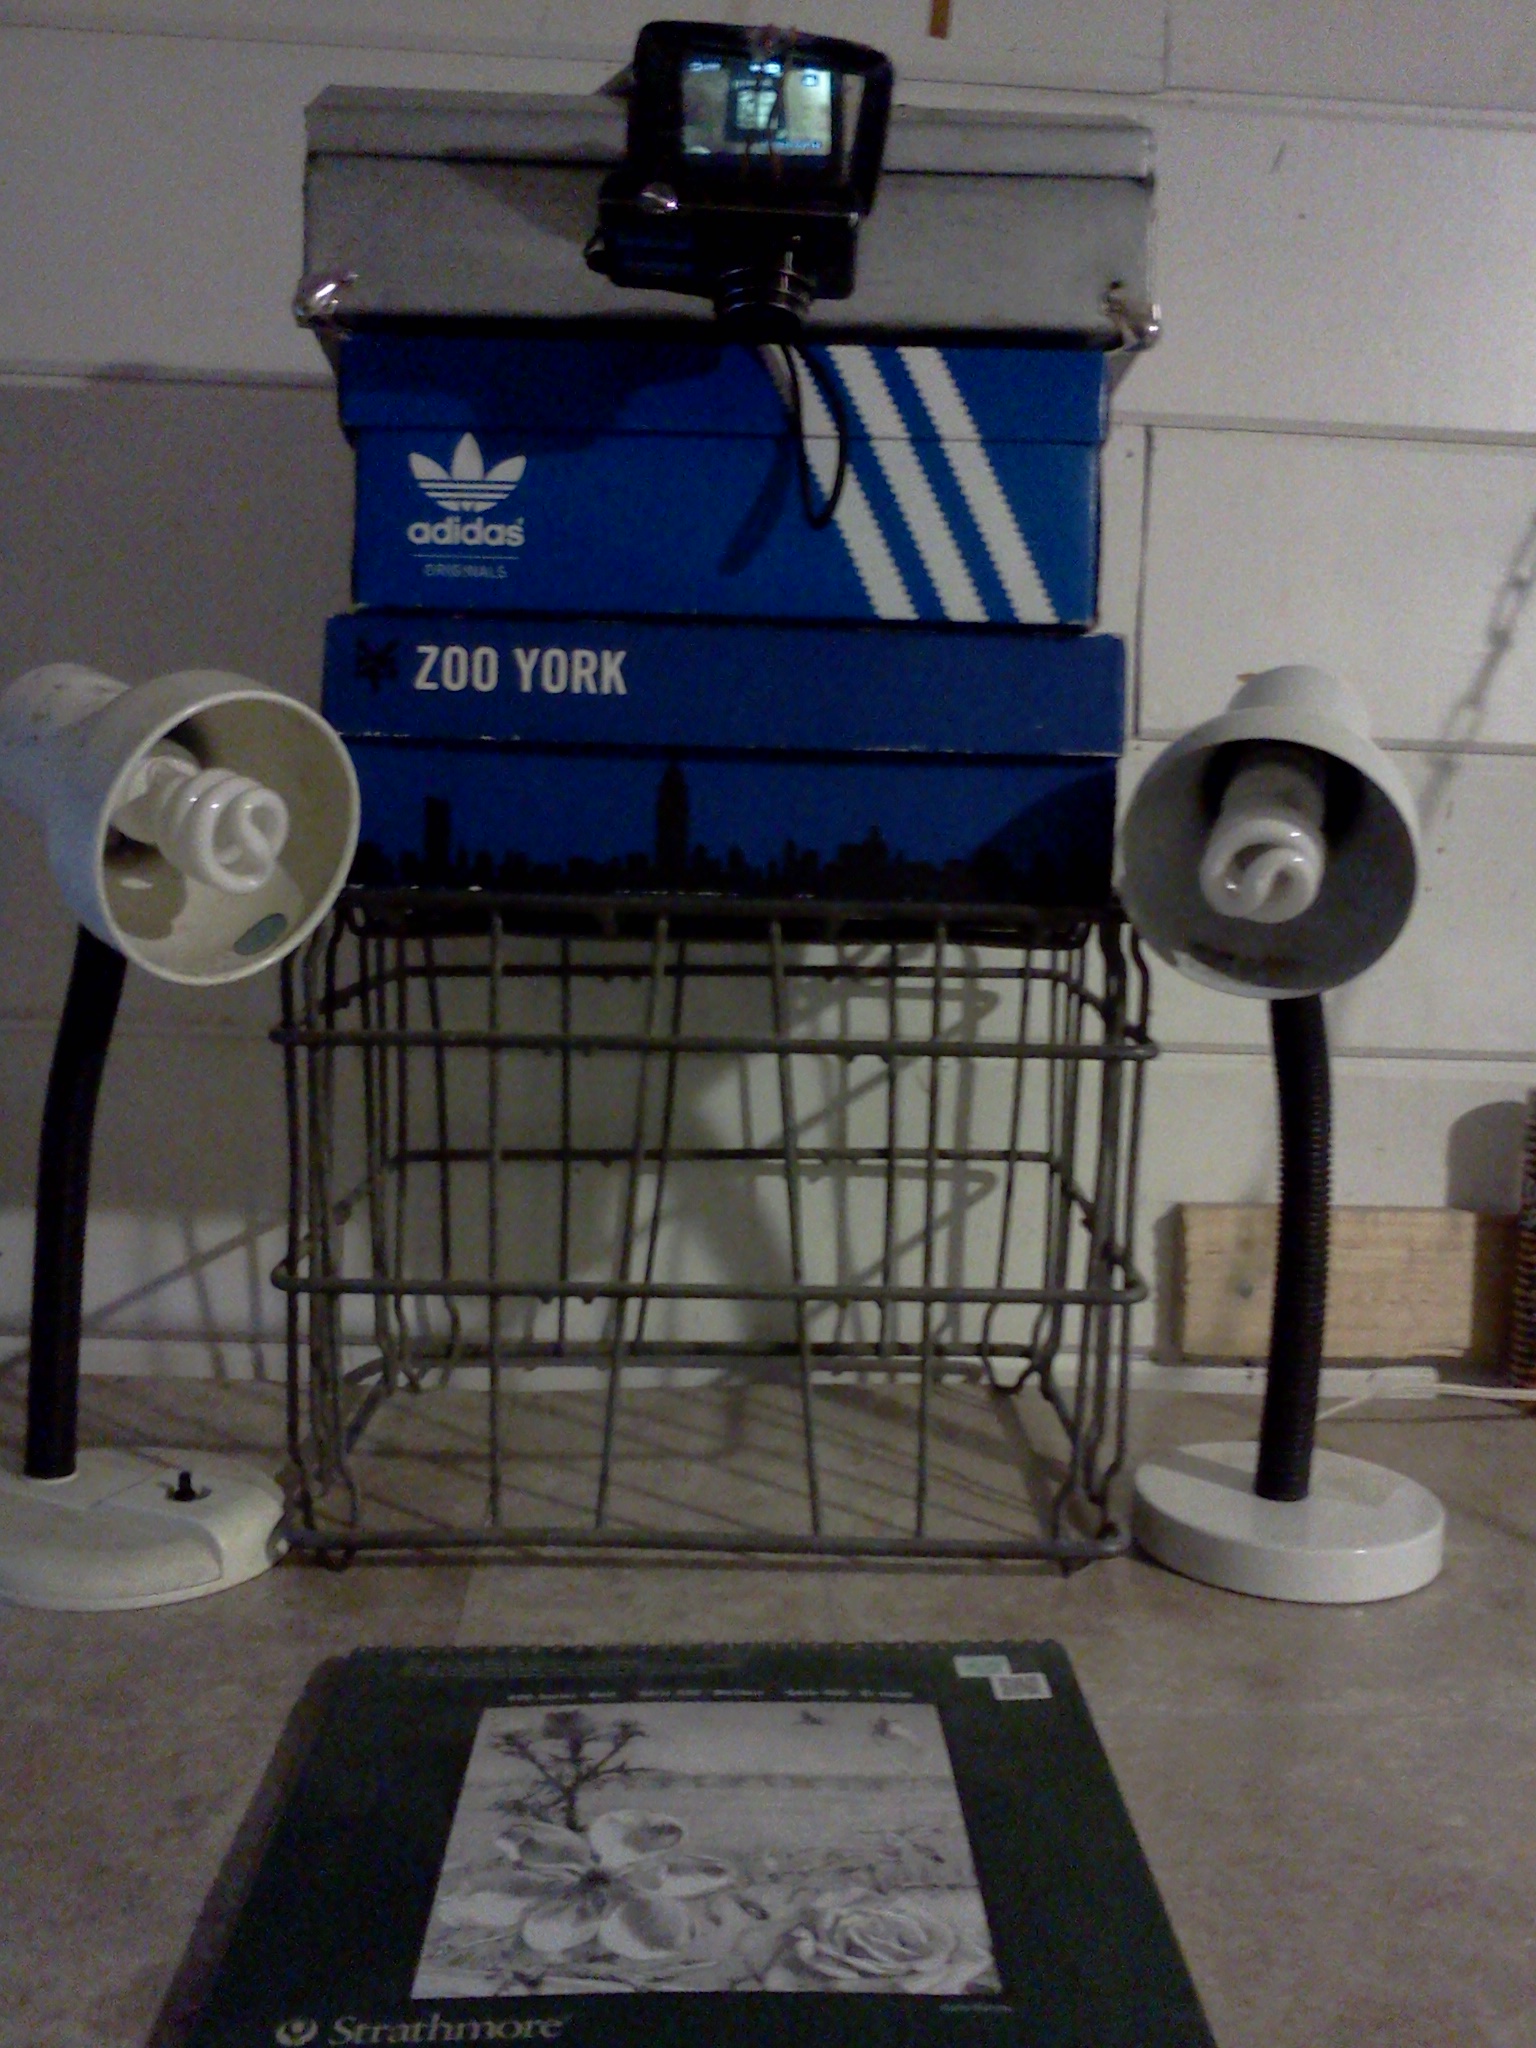
This is what I see when ever I draw. Truthfully all you need are some boxes and a small tripod or something that can hold the camera in place while it records. As you can see I use two lamps, this helps in the glare that might come from the graphite applied by the pencil and will minimize shadows. I used to do it by sunlight, but that would make the light in my videos inconsistent. Specially whenever nightfall came around and I had to change to a lamp. If you have ever seen some of my older videos you might be able to notice it (have I posted any of my old channel’s videos up?).
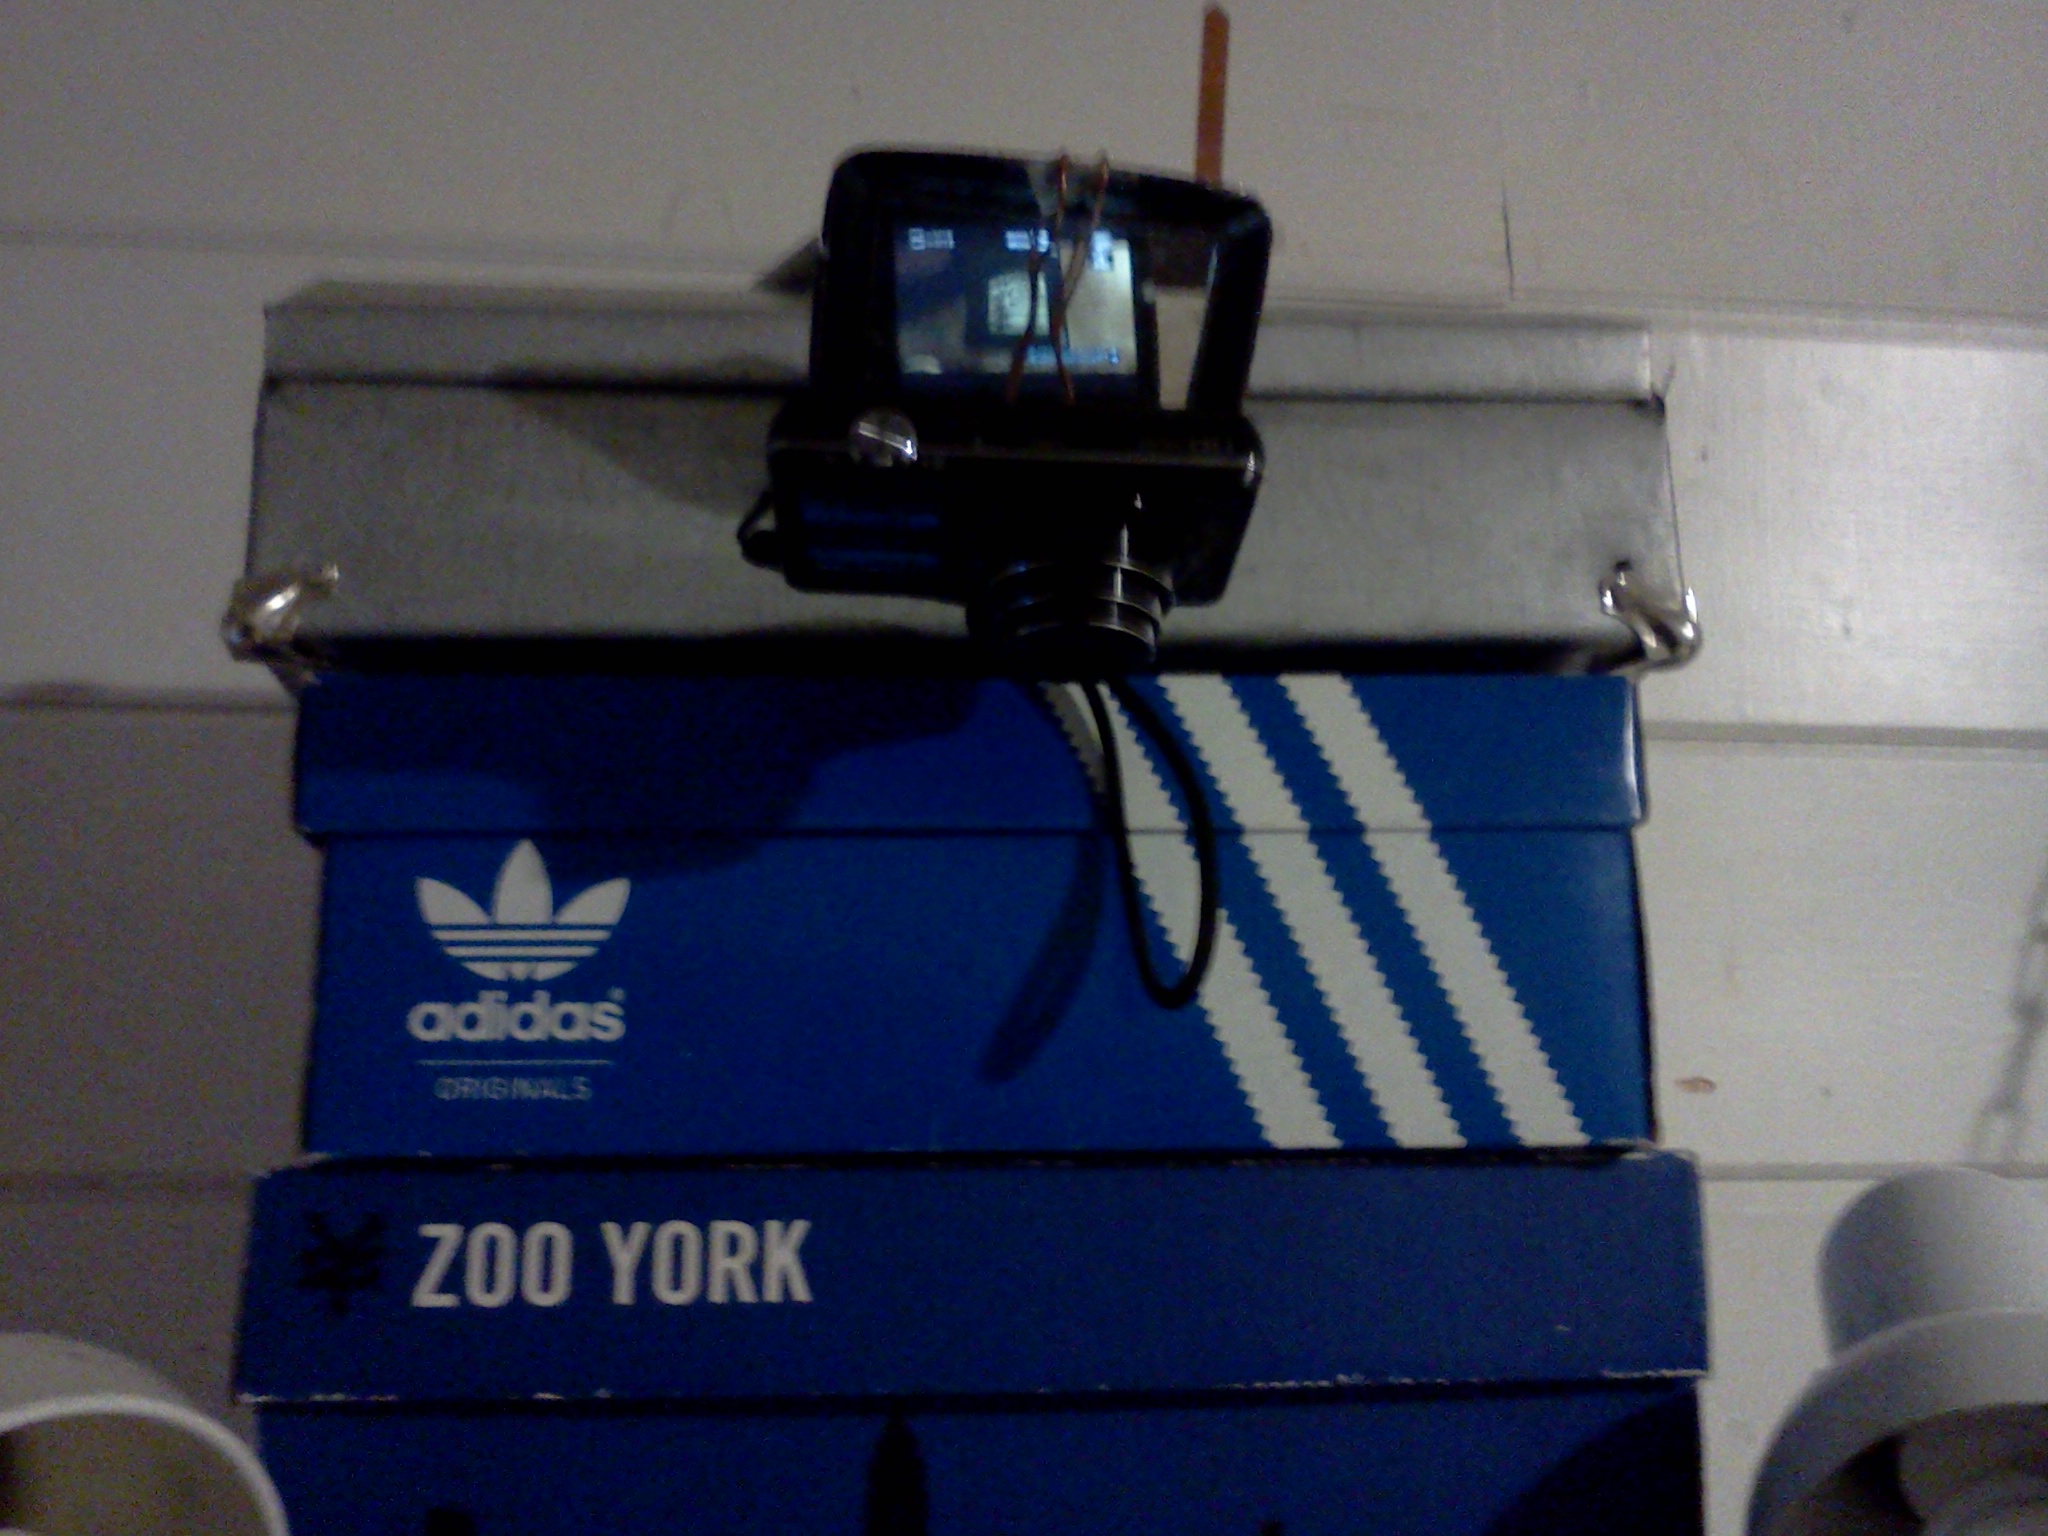
As you can see I have setup a small mirror that’s attached to my toolbox. This is important because it allows me to see how the camera is doing (how much time I have left, how much charge I have, etc.) and it is also very useful when setting it up so that you know the sketchbook is in the frame. So if you happen to move it in the moment or by accident you can just adjust it mid recording. The set up is quite easy, and can be done in seconds. Now if you notice the video will come out upside down, but that can be easily edited on a video editing software (this feature is present in the free Windows Movie Maker), you just select all the video files and turn them upside down, giving you the appropriate view. I’d say that’s all that is needed. One can get elaborate and put an adjustable tripod on the wall (horizontally, facing down like in my set up) so that it hangs that way instead of using boxes.
I hope this is helpful to anyone who is also thinking of making videos.
-XERO
