I’m a couple of days late, but I wanted to draw a piece commemorating the anniversary of ℃-ute, a group that I hold very dearly along with Berryz Koubou. I’m always delighted in knowing that they performed in Mexico.

Hasta la proxima,
-NUBE
"A Hopeless Dream Chaser"
I’m a couple of days late, but I wanted to draw a piece commemorating the anniversary of ℃-ute, a group that I hold very dearly along with Berryz Koubou. I’m always delighted in knowing that they performed in Mexico.
Hasta la proxima,
-NUBE
Main Channel version:
Extended version:
Hasta la proxima,
-NUBE

Main video:
Extended version can be seen here:
On April 8th there was a twitter challenge to redraw the character from a “How to draw Manga” book. The book they were talking about was a different one that I didn’t use my self. When I grew up, I used a the version distributed here in North America by Digital Manga Distribution. I know that the whole point of the challenge was to try and redraw that character, which is… well look at him yourself:

But I was thinking more in terms of retrying to draw a cover that I had once tried to draw when I was a kid. I didn’t quite get the contents of the book themselves, I was more interested in the cover art done by Kazuaki Morita.

In the end, I actually ended up finding that drawing I made years ago:
Man, that reversed hand is just…
Here is the current attempt:
The background music/sounds are from old trailers that I tended to hear from anime that I rented from my local library. People from my generation will know exactly what I’m talking about. Luckily, there are people online that are uploading these now classic anime history. Much like how AnimeCollective is doing. Link to each of the songs used and their respective trailers are below.
“Yumemiru Ai Tenshi” by by Ai tenshi densetsu Wedding Peach Trailer from ADV Films:
Media Blasters Trailer from Twin Signal:
“Wake Up” by Chisato:
“Treat or Goblins” by Megumi Hayashibara:
“Soramimi Cake” by Oranges & Lemons:
“Yuzurenai Negai” by Naomi Tamura:
“Carnival Babel” Takada Band:
I ended up only watching two of these anime. Blue Seed and Azumanga Daioh. I’m surprised I still haven’t seen Magic Knight Reyearth.
Hasta la proxima,
-NUBE
Here are the videos of me painting this Rei Ayanami painting.
The main video:
The Extended version:
Hasta la proxima,
-NUBE
I have been planning painting the other Eva units when they go berserk. This time though, I went for a complete digital painting. Rewatching the scene when Asuka activates the berserk mode is quite heart wrenching in all aspects. Specially since even then, she was completely overpowered and wrecked. Even now it’s hard watching her suffering that much. The end of Evangelion version is quite different from the rebuilds which I could also paint at some point, Although I would probably opt for a complete body since it has very interesting angles and poses. In this portrayal of the berserk scene in the End of Evangelion, I did a what if Asuka could over power the lance and destroy the mass produced Evas.
This painting was also done using the Real Tapered Wet Flat Brush, just as was done with Airi’s painting. Except for the background which was done using the Tapered Oils brush.
Hasta la proxima,
-NUBE
Decided to add a spirit gun.
Hasta la proxima,
-NUBE
 and a quick drawing of Goku celebrating")
I think I mentioned this before but I have been quite busy lately with my other job and building my desk PC which took me 4 weeks to complete. Had I had a bit more time to work on it I think I could have completed it in two weeks but such is life. Now I have more workspace since I added about 6 inches on the contour of the desk (minus the front side) so that I could clamp my three monitors thus giving me all of my original (about) 4 x 3 feet to use with all of my supplies that I would use as I work. I actually just made the finishing touches yesterday so I wasn’t really even able to use the desk till today. So far I’m really happy with the way it is all set up and because I made the outside contours on the sides so that I could clamp down my monitors I can now fully see all of the screen on both sides as I work on my XP-Pen which I of course left on the center. I’ll show some pics of it and the setup at some other time.
Way back in, whoa, May 28th (it’s been that long after all huh) I uploaded my painting celebrating Buono! To my surprise on June 8th I actually got a like from Natsuyaki Miyabi! Man it feels nice to know that the person you decided to make a painting of has seen your work. But to also get their approval of it is quite nice. I’m really glad my feelings of appreciation for her work has reached her.
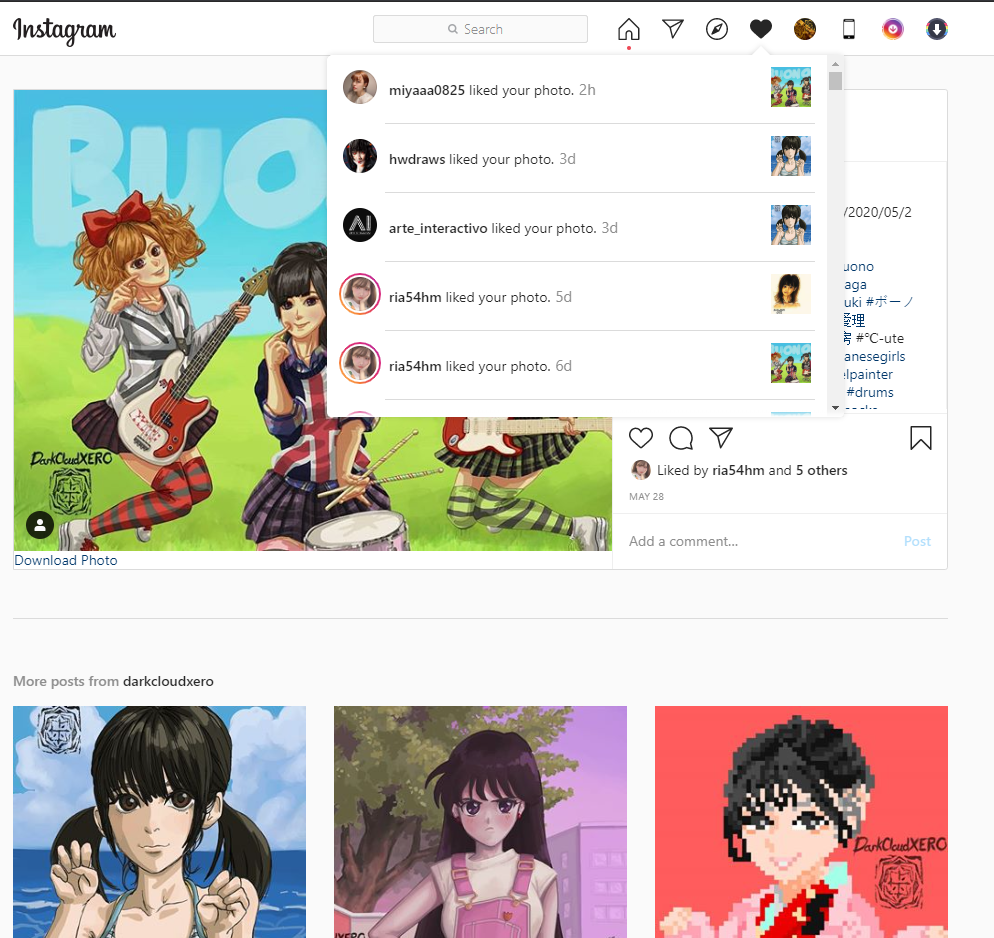
Here is the painting just in case you missed it. And here is a link to the original post.
While I was getting some supplies for my desk PC I stopped by a nearby dollar store and came across some small vials with cork caps. I got a set of two of the 6 packs so that I could store some pre mixed inks and watercolors that I could use when working with linework/outlines. For today I made a set of ink that got lighter and lighter for when I want to use different levels of black to gray inks. I have my diluted ink that is still quite dark in my original container and a set of 5 vials containing the newly created ink. I also made a reference sheet to show me the intesity of the ink within each vial and a date of when they were created just in case one of them runs out and I have to create a new batch which of course might not be the same as the previous one. Since it was running a bit late when I was completely done getting my worspace ready I decided to make a quick drawing. Since it was all about testing the desk I of course decided to go traditional (plus I also got to try out my inks, although I only used my base ink for this drawing). I’ll try to see if I could make a quick drawing every weekday for the rest of the summer on top of whatever new paintings I decide to work on. I already have an idea of the first piece I will be working on (hopefully starting tomorrow).
Here is that Goku drawing I did. Maybe I should have made some lines to express movement but overall I’m quite pleased with the results (was a bit scared that I wouldn’t be able to draw as I liked since I hadn’t done it in about 4 weeks).
Hasta la proxima,
-NUBE
The plan was to try out the other color pencil set I had but the colors weren’t right for the drawing I decided to do. But my Prismacolor set did have the right colors so I decided to use those instead. I was surprised at how amazing they were. I was having a lot of problems with them back in the day I remember, but I guess that was just my inexperience. Having said that, I’m nowhere near as good as the artists that specialize in color pencils. I was recently looking at the artwork of michaelfreemanpastelartist. He specializes in using pastel pencils it seems, and his art is photo realistic. It’s really amazing. I guess if I practice for a bit I should be able to improve a great deal my self, but my plan is to focus more on watercolors when it comes to traditional art. Instead I will use my color pencils as support. This has been the plan for a good bit, but I’ve never really used them together before. Maybe I’ll make that my next project.
Hasta la proxima,
-NUBE
This is a repaint of the original color pencil drawing I did in 2018. This newer version was painted in June 2019. I really don’t know why I decided to wait this long to upload it though. Thinking about it, I still have some more I haven’t showcased yet.
The tagline I had in mind when I first created this piece was rebellious (yankii) son vs stern (military) father.
Hasta la proxima,
-NUBE
This was originally drawn in July 26.
I’ve never used a dip pen till I drew these. I didn’t know exactly what I would be able to do so I went with a simple design. Then on September 3rd I decided to try giving it a simple painting process I believe using Photoshop.
Personally I liked the way Sayu’s ink drawing turned out.
First the ink drawings:

Kamei Eri:

Sayu’s drawing painted digitally:

I was wondering how much color I could actually work with, but since I was unsure I went with really simple colors. I like the way it looks but I really want to do things differently now. I wonder what colors I could use. The problem of using things like black pens is that it limits one through values. I’ll have to practice a bit and find out.
Here are the references used:
I was thinking if I should draw her eating the chicken wing but decided to omit it and instead gave her a similar expression since I really like how she looks in this photo.


Thinking back I’m quite amazed at how much I can do now after Inktober. I never would have guessed that I would not only be able to draw freehand with ink but that I would feel quite comfortable doing so. I still do mistakes from time to time but it isn’t too bad now. But since this was my first time and I rarely work with a permanent medium like ink when drawing I used a pencil to do the rough draft and primary line art.
Process:


I really like her expression and the way she looks right into one’s eyes.

I was contemplating what I would do about adding shading to her hair but I was too worried I would have messed it all up so I decided against it. Looking at it now I could have done so many things differently and add more details to make it all pop out more. But for a first attempt it isn’t too bad, the lines are just too rough.
Hasta la proxima,
-NUBE
Well didn’t plan that absense but I got really busy again and also just wanted to focus on some growth as an artist that I was truthfully just putting on the backburner thinking it would be ok to continue in that way. Of course, that came and caught on to me which is why I had another failure when I attended the COAF (that second anime convention I attended a while a go now). It did bum me quite a bit, I won’t lie. But it was for the best. I was taking old work from a couple of years ago that I was really just experimenting on and really that had no place in a selling environment… So I will start again and try my best to produce top quality work. Though I don’t really plan on attending another artist alley. They are quite boring. It’s much more fun actually attending it and walking around. I’ve got a whole lot more respect for them (the artists that attend anime conventions) now.
Well, once that convention was all over I decided to rethink my strategy and change some things. I will make that clear soon. But what I can say is that I want to grow exponentially in skill. I have a ways to go, but now I have a stronger motivation to do so. I promised my self that I would accomplish my goals, and I will. No use in making excuses or analyzing everything. Let’s just get better and do. That’s something I have forgotten how to do since I got out of high school. It’s time I bring back that type of dicipline back in my life.
That will be all for now.
Hasta la proxima.
-Nube
These have been some rather harsh two weeks… I’ve been meaning to categorize all of my picture references that I have been accumulating over the years. I’ve had to do this before, and I remember saying that I would not allow that to happen again. But it happened… And boy did it happen. I found a folder with 15,000 that took me a week to categorize. Just when I thought I was done, another folder with 6,000 appeared. Then when I finished with that one I found another folder with about 5,000. But I went through them. I was pleased since this would help speed up my productivity in finding what I needed.
All was well for a couple of hours but then I made the discovery of another folder that I thought were all duplicates filled with over 60,000 pictures. I was utterly stunned.That’s when I decided to use a program to help me weed out the files I had already categorized. Seeing that I could do this automatically, I can’t deny that I was beyond ecstatic.
https://www.flickr.com/photos/darkcloudxero/33206536136/in/dateposted-public/
But to my surprise it only managed to delete about 10,000 duplicates. Meaning that I still had a scary amount of pictures to sift through. That’s going to take a while to do. But oh well. I’ll scrape at it whenever I have the chance. Sadly right now I can’t continue going at it full time since I need to start getting ready for the next convention and restarting work for my Youtube channel.
I decided to seperate a smaller amount into one folder to make it more manageable.
https://www.flickr.com/photos/darkcloudxero/32433597553/in/dateposted-public/
I’ll work with that folder than try to finish the boss folder that still contains
https://www.flickr.com/photos/darkcloudxero/32865196420/in/dateposted-public/
Speaking of my Youtube channel, I recently bought a folding arm for my camera. I was first looking at ones made specifically for cameras but they were all pricey. But as I kept searching I noticed that the same products made for microphones were a lot cheaper. $8 cheap. So I decided to go for one of those. I knew it would have some defects for that price, and that since it was made for microphones it would most likely have some connection issues.
Sure enough it did. The screw was 3/8″ but my camera takes 1/2″. I was first thinking about buying an adapter that was female 3/8″ and 1/2″ male. But the prices were a bit pricey and the cheaper ones would take weeks to arrive. So before ordering I decided to look around my house for a long flat screw that would take it’s place. Luckily I found two. What’s cool is that the screw is held by a clamp that could easily be replaced with other screws.
This is what I mean.
https://www.flickr.com/photos/darkcloudxero/33092368932/in/dateposted-public/
https://www.flickr.com/photos/darkcloudxero/33207095076/in/dateposted-public/
So that was all great and all. But now the question was about figuring out where I would be attaching it. My original plan was right in front of me behind the laptop, but that would mean I had to lose more space in my desk and even my room because it would push the laptop forward and since it isn’t a thin clamp, it would push the desk at least 3 inches off the wall. So I decided against it. I have a shelve I made right above me that I foolishly thought I would be able to put it through. But again putting it along the wall would not work for the same reasons, no space to even fit it in.
At this point I was even humoring the idea of putting it in front of the desk, and I would put my shoulder right next to it as I would work around it. It would have worked, but not only would it look dumb, it was also a bit uncomfortable. The other option I saw after thinking for a while was placing it on the shelve, placing it on the front would place the arm too far towards the back of the desk away from my work area. So that would not work, but from the sides it should work. Putting it on the left side would not reach the center of the desk, so the only option is from the right side.
That worked well, but I ran into some problems where the screw would point the camera outside of my work area as well, this time it was too far to the left side of the desk. But that was an easy fix. I just bent the screw with a hammer and that small bend fixed all my problems.
Here’s how it looks.
https://www.flickr.com/photos/darkcloudxero/33207092946/in/dateposted-public/
Now I just needed to fix my mirror so that it would show me my camera to keep track of when it stops recording and to keep track that it is recording what I need. Having that mirror is very important to make sure the drawing is in frame and troubleshoot as I record.
But this all brought an other set of issues. For one, as I thought an $8 dollar folding arm isn’t strong enough to stay in place with any extra amount of weight added to it. And it would only get worse as it got older and used more.With that in mind, there is no way I could add the mirror I am now using which is big and would add quite a bit of weight. And since the only way of attaching them is to somehow balance it on the screw and somehow tie it as well, that was obviously not an option.
This is how I had it before with my old set up. It did change a bit over the years since then, but it was still functioning on the same concept all these years.
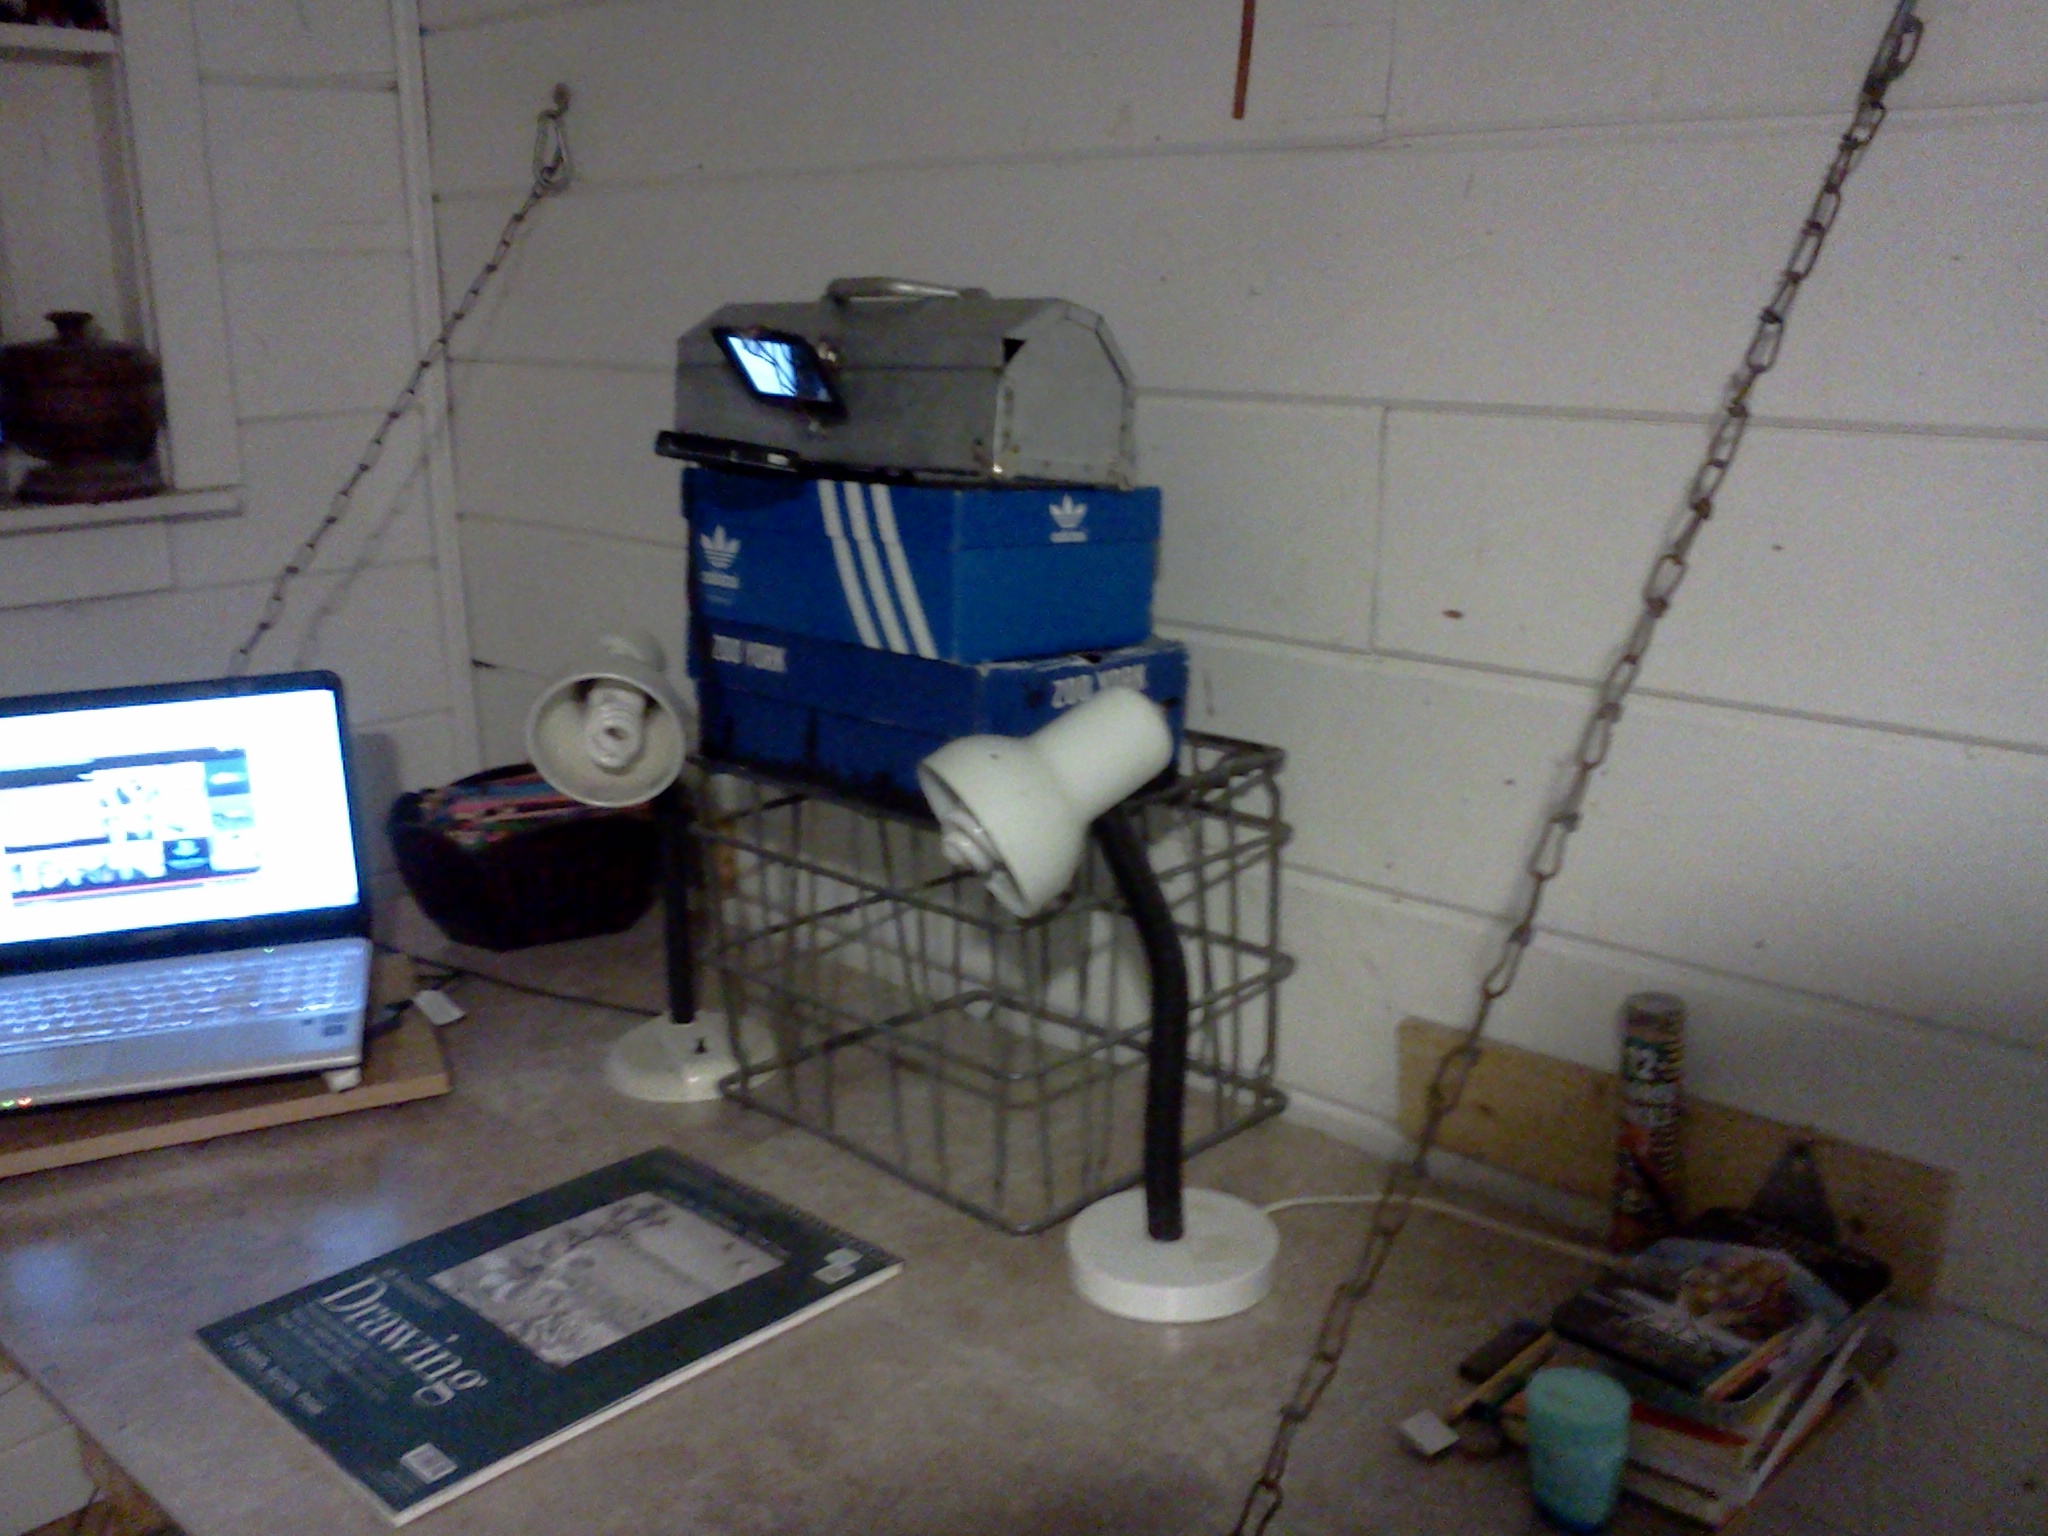
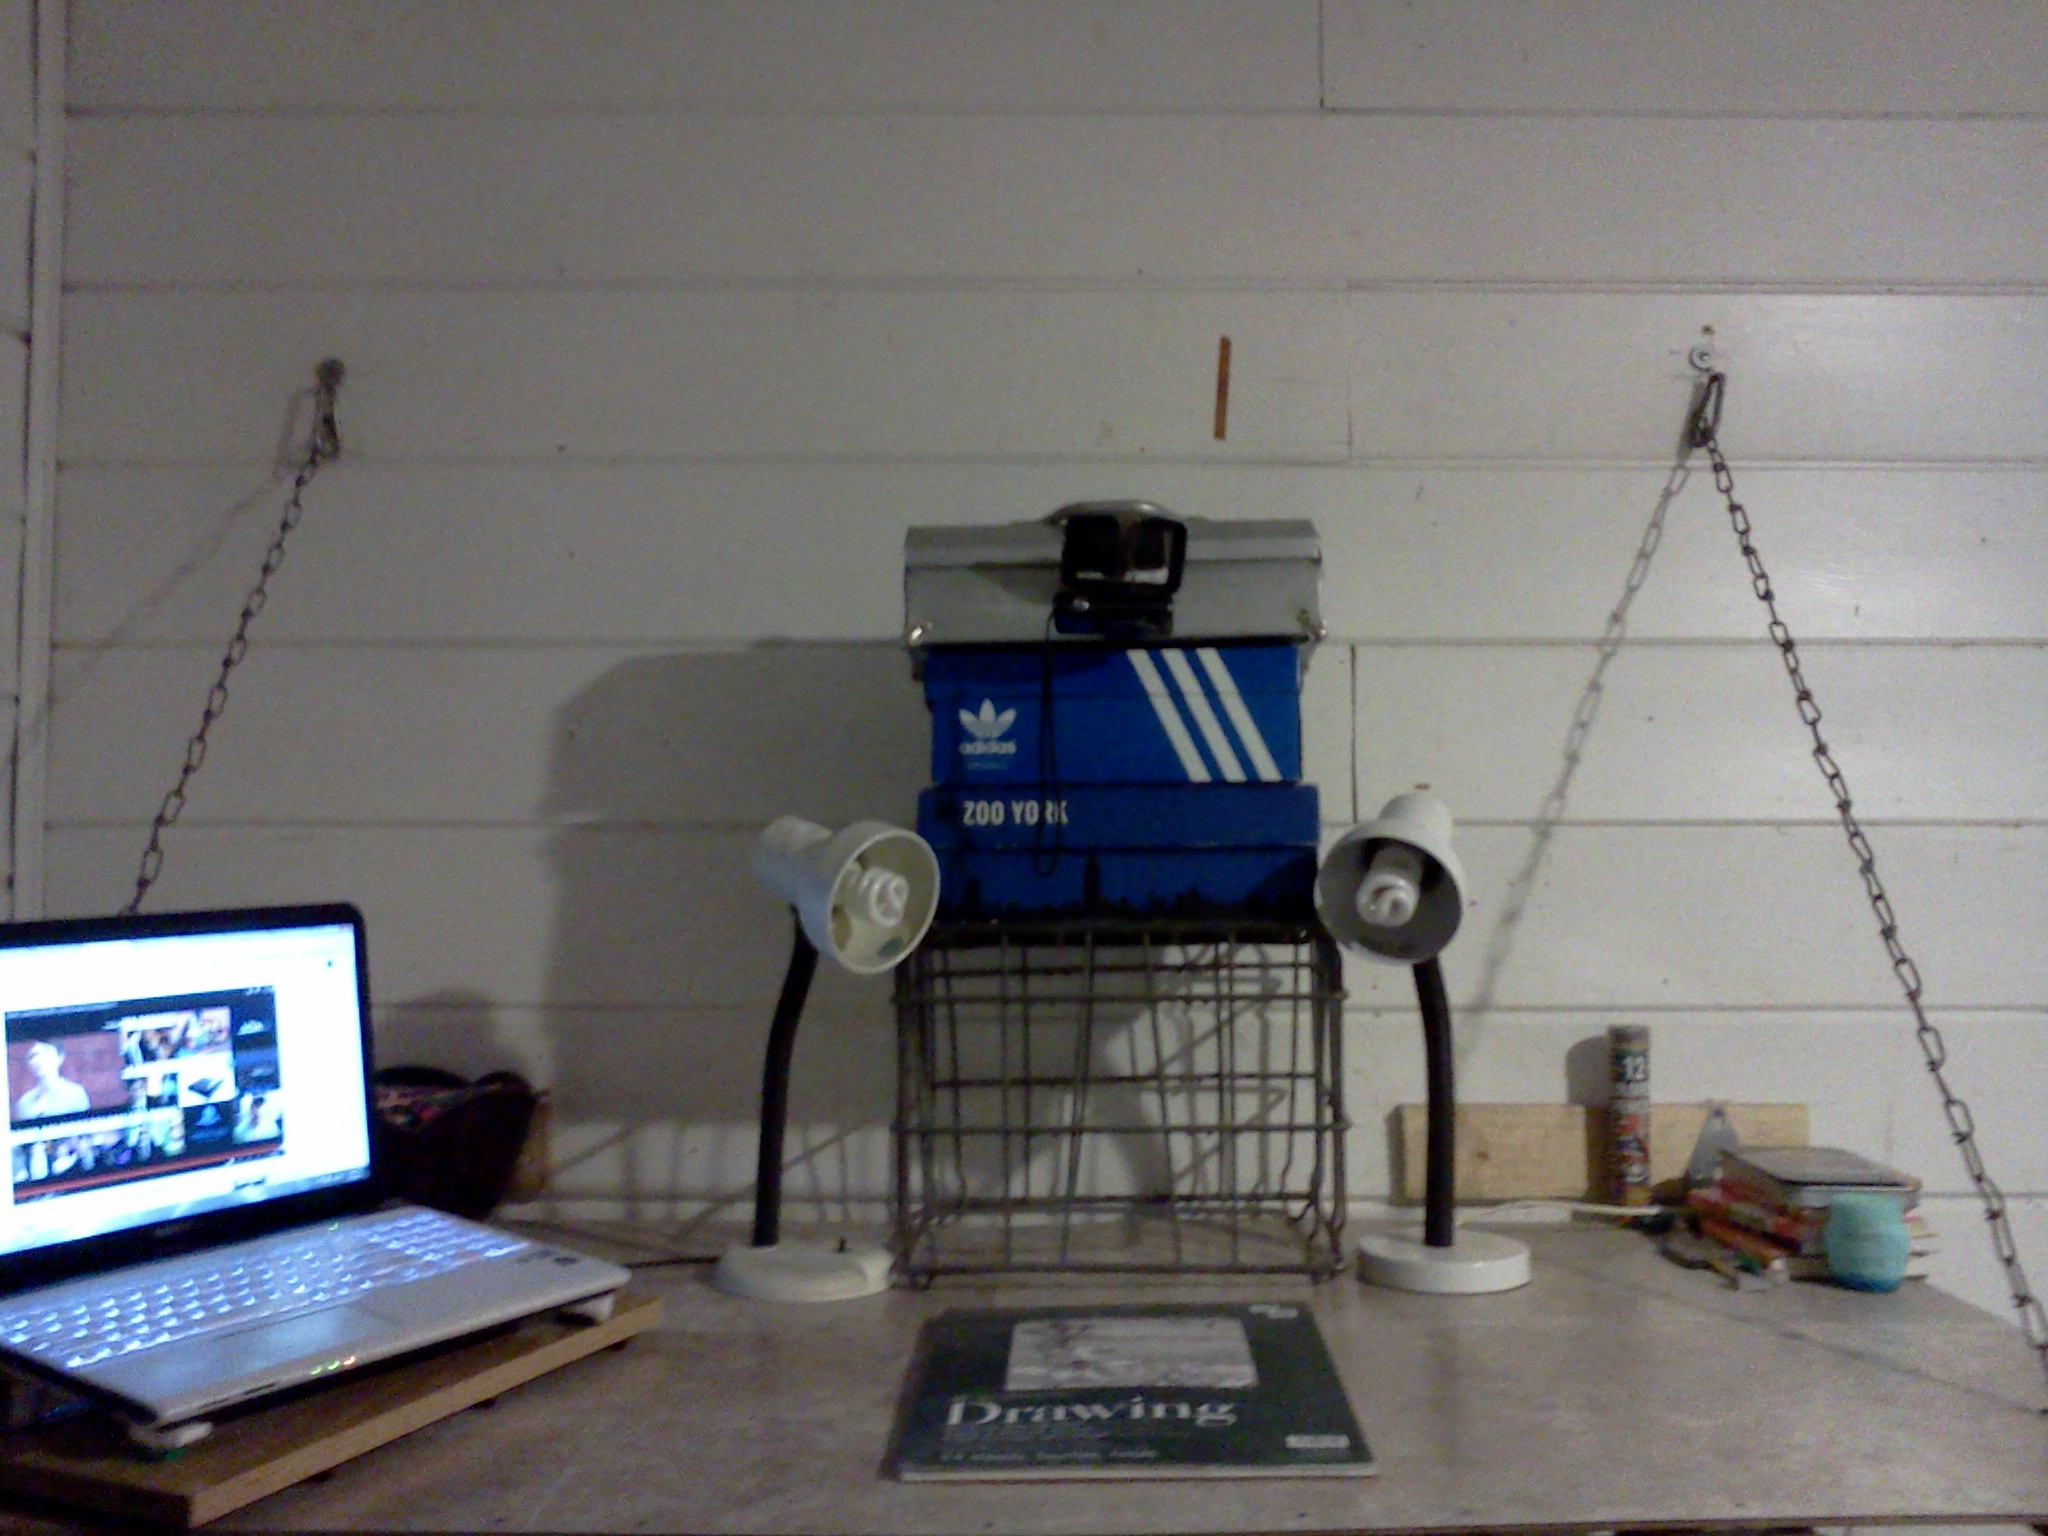
Ah, 2013… good times… You can see a bit more about that simple setup here. This works great if all you have is your desk and it has a good bit of space on your desk. If not, just get thin boxes and add some weight so that they don’t topple over. To connect it to your camera buy yourself a small tripod, I recommend the bendy ones.
But that would not work with this setup due to the smaller desk space that is now populated by my laptop and a second screen. I had to stop and think about it for a good bit. I was even considering buying a cheap mirror from a dollar store. Luckily I decided not to do so and found a much better solution.
This is where my shelve once again came to the rescue. And I was even more glad that the folding arm was clamped from the side.
This is the solution I found, and it works great no matter the height of the camera, desk or arm. And since the mirror is in a stand that allows it to be tilted at any angle I can fix it in any position that would allow it to be seen whether I am sitting down or standing.
https://www.flickr.com/photos/darkcloudxero/33091865302/in/dateposted-public/
https://www.flickr.com/photos/darkcloudxero/33248157645/in/dateposted-public/
Notice that small rope attached to the folding arm? Well that’s where the defects I mentioned before start coming into effect. As expected, as soon as I attached the camera, the folding arm started moving down from the position I had placed it at. But that can easily be fixed with a small rope so that it would stay in place no matter how much I use it. And the rope can be shortened or elongated depending on the position of the arm.
Here’s how it all looks.
https://www.flickr.com/photos/darkcloudxero/33091862092/in/dateposted-public/
It may not seem like much, but this will make things so much easier and versatile when working. I no longer have to make time to set up and I can make a couple of adjusments on the fly as I work. My work station has come a long way.
That will be all for now. I have to get back to working on some new work. categorizing and whatnot.
Hasta la proxima.
-Nube
